
The MSI MAG Z790 Tomahawk WiFi is a robust platform designed for Intel 13th Gen processors, offering essential features for high-speed performance and reliability.
Overview of the Motherboard
The MSI MAG Z790 Tomahawk WiFi motherboard stands as a compelling choice within the Z790 chipset family, delivering a strong balance of features and performance without demanding an excessively high price point. This board is specifically engineered to support Intel’s 13th generation processors, unlocking their full potential for gaming, content creation, and demanding workloads.
It distinguishes itself by offering a comprehensive set of connectivity options, including DisplayPort, HDMI, and multiple USB ports, ensuring compatibility with a wide range of peripherals and displays; While it may lack a PCIe 5.0 M.2 slot found in higher-end models, the Tomahawk WiFi compensates with a solid foundation of essential components and robust build quality. The included manual provides detailed guidance for installation and configuration.
Key Features and Benefits
The MSI MAG Z790 Tomahawk WiFi boasts several key features enhancing user experience. It provides robust power delivery for stable overclocking of 13th Gen Intel CPUs. Integrated WiFi 6E ensures fast and reliable wireless connectivity. Multiple M.2 slots accommodate high-speed NVMe SSDs for rapid storage.
The motherboard’s design prioritizes durability and thermal management, crucial for sustained performance. The included MSI Center software simplifies system monitoring and control. Easy driver installation via the provided USB drive streamlines setup. The detailed manual guides users through BIOS configuration and troubleshooting. Ultimately, it delivers a feature-rich experience, balancing performance and value effectively.
Target Audience & Use Cases
The MSI MAG Z790 Tomahawk WiFi primarily targets gamers, PC enthusiasts, and content creators seeking a high-performance yet reasonably priced motherboard. It’s ideal for building powerful gaming rigs capable of handling demanding titles at high settings. Content creators will benefit from its robust connectivity and storage options for video editing and rendering.
The board also suits users interested in overclocking, thanks to its solid power delivery system. Its comprehensive feature set makes it suitable for both experienced builders and those relatively new to PC assembly, aided by the detailed manual. It’s a versatile choice for a wide range of demanding computing tasks.

Unboxing and Package Contents
The MAG Z790 Tomahawk WiFi package includes the motherboard, user manual, accessories, and necessary cables for a smooth installation process, as detailed within.
What’s Included in the Box
Upon opening the MSI MAG Z790 Tomahawk WiFi box, users will find a comprehensive set of components designed to facilitate a seamless building experience. The core component, of course, is the motherboard itself, carefully packaged to prevent damage during shipping. Alongside the motherboard, a detailed user manual is included, providing step-by-step instructions for installation, BIOS configuration, and troubleshooting.
Essential accessories are also present, such as the I/O shield, which fits into the rear panel of the computer case, and SATA cables for connecting storage devices. Furthermore, an MSI branded screw package ensures you have the correct hardware for mounting the motherboard and various components. A USB drive containing drivers and utilities is also provided, simplifying the software installation process. Finally, the box includes a Wi-Fi antenna for wireless connectivity.
Initial Inspection & Accessories
Before commencing the build, a thorough inspection of the MSI MAG Z790 Tomahawk WiFi and its accessories is crucial. Carefully examine the motherboard for any physical damage incurred during shipping, paying close attention to the PCIe slots, RAM slots, and the CPU socket. Verify the presence of all listed accessories: the I/O shield, SATA cables, screws, and the USB drive.
Ensure the I/O shield is free from bends or distortions, as a proper fit is essential for rear panel connectivity. Confirm the USB drive is intact and contains the necessary drivers and utilities. The included Wi-Fi antenna should also be inspected for any damage. Any discrepancies or damage should be reported immediately to the retailer or MSI support.

Technical Specifications
The MAG Z790 Tomahawk WiFi supports Intel 13th Gen CPUs, DDR5 memory, and features a Z790 chipset, delivering a powerful foundation for modern computing.
CPU Support (Intel 13th Generation)
The MSI MAG Z790 Tomahawk WiFi motherboard is specifically engineered to fully support Intel’s 13th generation processors. This includes compatibility with a wide range of CPUs from the Intel Core i9, i7, and i5 series, utilizing the LGA 1700 socket. The board’s robust power delivery system ensures stable operation even under demanding workloads and overclocking scenarios.
Users can expect optimal performance and responsiveness when pairing this motherboard with the latest Intel processors. The Z790 chipset, combined with the board’s design, unlocks the full potential of these CPUs, providing a seamless and powerful computing experience. Detailed CPU compatibility lists are available on the MSI website for verification.
Chipset Details (Z790)
The MSI MAG Z790 Tomahawk WiFi utilizes the Intel Z790 chipset, the latest generation platform for enthusiast-level desktop PCs. This chipset provides a wealth of advanced features, including enhanced connectivity, improved overclocking capabilities, and support for the newest technologies. The Z790 chipset enables flexible PCIe lane configurations, allowing for multiple high-speed devices like graphics cards and NVMe SSDs to operate simultaneously.
Furthermore, the Z790 chipset facilitates increased memory speeds and capacities with DDR5 support. It also offers robust I/O options, including numerous USB ports and integrated Wi-Fi 6E. This chipset is the core of the motherboard’s performance and functionality, delivering a premium user experience.
Memory Support (DDR5)
The MSI MAG Z790 Tomahawk WiFi boasts cutting-edge DDR5 memory support, unlocking significantly faster data transfer rates compared to previous generations. This motherboard supports DDR5 memory modules, enabling enhanced system performance and responsiveness. It allows for incredibly high memory speeds, potentially reaching and exceeding 6400MT/s, depending on the module and CPU compatibility.
The Z790 chipset and this motherboard design support high-density DDR5 modules, allowing for substantial system memory capacity. Dual-channel memory architecture further optimizes bandwidth. Users can expect improved multitasking, faster application loading, and a smoother overall computing experience with DDR5 memory on this platform.

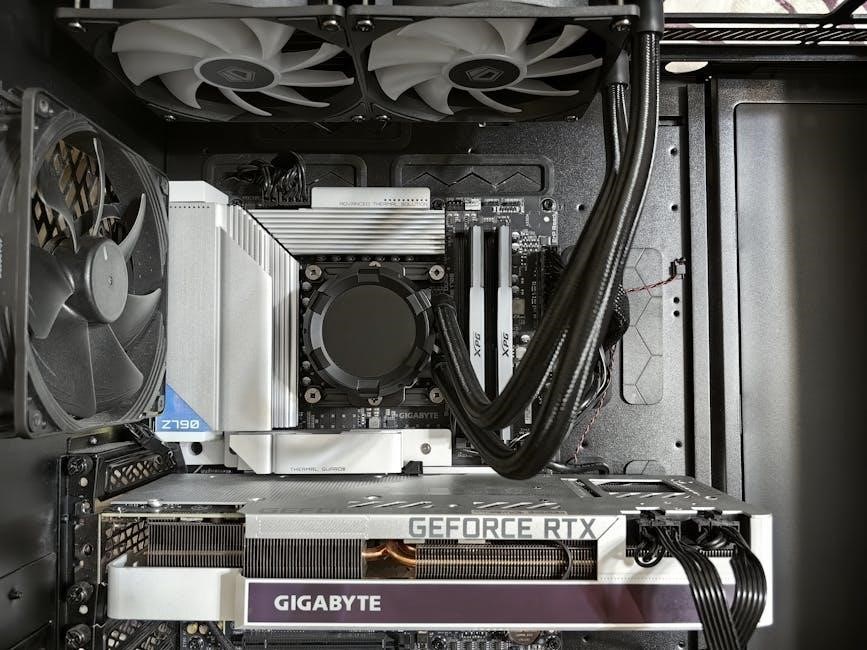
Motherboard Layout & Components
The MAG Z790 Tomahawk WiFi features strategically placed connectors, including front panel, rear I/O (DisplayPort, HDMI, USB), and internal slots (M.2, SATA).
Front Panel Connectors
Connecting the front panel connectors is crucial for the proper functioning of your system’s power button, reset button, and status LEDs. The MSI MAG Z790 Tomahawk WiFi motherboard provides a dedicated front panel header, clearly labeled for easy identification.
Refer to your motherboard manual for the precise pinout diagram, as incorrect connections can prevent the system from powering on or functioning correctly. Typically, these connectors include Power SW, Reset SW, Power LED, and HDD LED. Ensure polarity is observed for the LEDs; reversing the polarity will simply prevent them from illuminating. Careful attention to the manual’s instructions will guarantee a smooth and trouble-free setup of these essential components.
Rear Panel I/O Ports (DisplayPort, HDMI, USB)
The rear panel I/O of the MSI MAG Z790 Tomahawk WiFi offers a comprehensive selection of ports for connecting peripherals and display devices. You’ll find DisplayPort and HDMI ports for high-resolution video output, supporting multiple monitors for immersive gaming or productive multitasking.
Numerous USB ports, including USB 3.2 Gen 1 and Gen 2, cater to a wide range of devices, from keyboards and mice to external storage. An Ethernet port provides a stable wired network connection, while audio jacks enable high-fidelity sound; Refer to the motherboard manual for specific port locations and capabilities to ensure optimal connectivity and performance.
Internal Connectors (M.2 Slots, SATA Ports)
Internally, the MSI MAG Z790 Tomahawk WiFi boasts multiple M.2 slots for lightning-fast NVMe SSD storage, significantly boosting system responsiveness and loading times. The motherboard also includes several SATA ports, accommodating traditional hard drives and SSDs for expanded storage capacity.
These connectors provide flexibility in building a storage solution tailored to your needs. Consult the motherboard manual for the precise locations and supported specifications of each M.2 and SATA port. Proper installation and configuration, as detailed in the manual, are crucial for maximizing storage performance and ensuring system stability.

Installation Guide
Carefully follow the manual for proper CPU, RAM, and cooler installation, ensuring compatibility and optimal performance with the MSI MAG Z790 Tomahawk WiFi.
CPU Installation
Before installing the CPU, ensure the motherboard is grounded to prevent static discharge. Carefully open the CPU socket lever on the MSI MAG Z790 Tomahawk WiFi. Align the CPU with the socket, matching the golden triangle on the CPU to the corresponding corner on the socket. Gently place the CPU into the socket – do not force it! Once seated correctly, close the lever to secure the processor.
Incorrect installation can damage both the CPU and the motherboard. Refer to the manual’s diagrams for precise alignment guidance. Double-check that the CPU sits flush within the socket before proceeding with cooler installation. Proper CPU installation is crucial for system stability and performance.
RAM Installation
To install RAM on the MSI MAG Z790 Tomahawk WiFi, open the retaining clips on the appropriate DIMM slots, consulting the motherboard manual for dual-channel configuration. Align the notch on the DDR5 memory module with the key in the slot. Apply firm, even pressure to both ends of the module until it clicks into place and the retaining clips automatically close.
Ensure the RAM is fully seated; improper installation can prevent the system from booting. Verify compatibility with the motherboard’s QVL (Qualified Vendor List) for optimal performance. Installing RAM correctly is vital for system stability and accessing the full memory bandwidth.
Cooler Installation
Installing a CPU cooler on the MSI MAG Z790 Tomahawk WiFi requires careful attention. First, install the appropriate mounting bracket for your cooler, referencing the cooler’s manual for specific instructions. Apply thermal paste to the CPU’s integrated heat spreader (IHS) – a pea-sized amount is generally sufficient.
Carefully align the cooler with the mounting bracket and secure it, tightening screws in a diagonal pattern to ensure even pressure. Ensure the cooler makes firm contact with the CPU. Proper cooler installation is crucial for maintaining optimal CPU temperatures and preventing thermal throttling.

BIOS Setup & Configuration
Accessing the BIOS allows for customization of system settings, including boot order, overclocking, and hardware monitoring, crucial for optimizing performance.
Accessing the BIOS
To enter the BIOS setup on the MSI MAG Z790 Tomahawk WiFi, power on your computer and repeatedly press the “Delete” key during the initial startup sequence. This key is typically displayed briefly on the screen during the Power-On Self-Test (POST). Alternatively, you can attempt to access the BIOS by pressing the F2 key.
If your system boots directly into the operating system, you may need to utilize the advanced startup options within Windows. From within Windows, navigate to Settings > Update & Security > Recovery. Under “Advanced startup,” click “Restart now.” After restarting, select “Troubleshoot” then “Advanced options” and finally “UEFI Firmware Settings.” This will reboot your system directly into the BIOS setup utility. Ensure a USB keyboard is connected directly to the motherboard for reliable BIOS access.
Basic BIOS Settings
Within the BIOS, the “OC” tab is central for performance tuning, while “Settings” manages system configurations. “Boot” controls the boot order, prioritizing devices like your SSD or NVMe drive. The “M-Flash” section allows BIOS updates directly from a USB drive – crucial for stability and new CPU support.
Under “Settings,” explore options for SATA mode (AHCI recommended for SSDs) and adjust fan control profiles for optimal cooling. The “Security” tab allows setting administrator and user passwords. Remember to save changes before exiting the BIOS using the F10 key; confirm the save operation to apply the new settings. Incorrect BIOS settings can prevent booting, so proceed cautiously.
Overclocking Options
The MSI MAG Z790 Tomahawk WiFi BIOS provides extensive overclocking capabilities. Within the “OC” tab, you can adjust CPU multiplier, base clock (BCLK), and voltage settings. Utilize the “CPU Ratio” to incrementally increase clock speeds, monitoring stability with stress tests. Adjusting the CPU core voltage is vital, but proceed cautiously to avoid damage.
Memory overclocking is achieved through XMP profiles or manual adjustments of DRAM frequency, timings, and voltage. Monitor temperatures closely using the BIOS or MSI Center software. Save profiles for easy recall. Overclocking voids warranties and carries risk; thorough research and careful adjustments are essential for stable performance.
Driver Installation & Software
Drivers are available on the included MSI USB drive, ensuring compatibility and optimal performance for the MAG Z790 Tomahawk WiFi motherboard’s components.
Installing Drivers from MSI USB Drive
To begin driver installation, first ensure your computer is powered on and running Windows 10 or Windows 11. Next, carefully insert the provided MSI USB drive into an available USB port on your system. Upon insertion, an auto-run menu should appear, displaying a “Disc Image file” containing all necessary drivers and utilities for the MAG Z790 Tomahawk WiFi motherboard.
Double-click the Disc Image file to initiate the driver installation process. Follow the on-screen prompts, accepting any license agreements and choosing your preferred installation directory. The installer will automatically detect your system’s hardware and install the appropriate drivers for optimal performance. It’s recommended to restart your computer after the installation is complete to ensure all drivers are properly loaded and functioning;
MSI Center Software Overview
MSI Center is a unified software platform designed to manage and monitor your MSI MAG Z790 Tomahawk WiFi motherboard. It provides a centralized interface for controlling system settings, customizing RGB lighting, and optimizing performance. Through MSI Center, users can easily update BIOS versions, monitor hardware health, and adjust fan curves for efficient cooling.
The software offers various modules, including hardware monitoring, RGB Mystic Light control, and user profiles. These modules allow for granular control over system components and personalization options. Regularly checking for updates within MSI Center ensures you have the latest features and improvements, maximizing the potential of your motherboard and enhancing your overall computing experience.
Updating Drivers and BIOS
Keeping your drivers and BIOS up-to-date is crucial for optimal performance and stability of your MSI MAG Z790 Tomahawk WiFi. MSI provides convenient methods for updating these components. Utilizing the MSI USB drive, you can access a Disc Image file containing the latest drivers directly within Windows 10 or 11.
Alternatively, MSI Center offers a streamlined update process. The software automatically checks for available updates for both drivers and the BIOS, simplifying the installation process. Regularly updating ensures compatibility with new hardware, resolves potential bugs, and unlocks performance enhancements. Always follow the on-screen instructions carefully during BIOS updates to avoid any issues.

Troubleshooting Common Issues
Addressing potential problems, the MAG Z790 Tomahawk WiFi may encounter issues like no power, display problems, or USB port malfunctions requiring careful diagnosis.
No Power/Boot Issues
If the system fails to power on, first verify the power supply connection to the motherboard and the wall outlet. Ensure the PSU switch is flipped to the ‘on’ position. Next, check the front panel connectors are securely attached, as incorrect placement can prevent booting.
For no-boot scenarios, confirm RAM modules are correctly seated in the appropriate DIMM slots, consulting the motherboard manual for optimal configuration. A cleared CMOS can resolve boot loops; locate the CLR_CMOS jumper and follow the manual’s instructions.
Inspect for any short circuits caused by stray screws or metallic objects. If problems persist, try booting with minimal hardware – one RAM stick and the CPU – to isolate the issue. A failing component might be the culprit.
Display Problems
If experiencing no display, initially confirm the monitor cable (DisplayPort or HDMI) is firmly connected to both the graphics card (if present) and the monitor itself. If using integrated graphics, ensure the monitor is connected to the motherboard’s display outputs.
Verify the monitor is powered on and set to the correct input source. Try a different cable or monitor to rule out those components as the source of the issue. A dedicated graphics card may require additional power connectors to function correctly; check these connections.
Update graphics drivers via the MSI Center software or directly from the manufacturer’s website. A corrupted driver can cause display malfunctions. Reseating the graphics card can also sometimes resolve connectivity problems.
USB Port Issues
If USB ports aren’t functioning, first ensure the devices are properly connected. Try different USB ports on the motherboard, including both USB 2.0 and USB 3.2 ports, to identify if the problem is isolated to a specific port. Check Device Manager in Windows for any flagged devices or driver errors;
Reinstalling USB drivers through MSI Center or directly from Windows Update can often resolve connectivity issues. Ensure sufficient power is supplied to the USB ports, especially for high-power devices. A faulty USB device can also cause problems; test with a known working device.
BIOS settings may also affect USB functionality; verify USB configuration within the BIOS setup.