
LiftMaster 98022 Manual: A Comprehensive Guide
This guide provides detailed instructions for the LiftMaster 98022 wall mount WiFi garage door opener, covering installation, programming, operation, and maintenance. Downloadable PDF manuals, user guides, and specifications are readily available online for easy access.
The LiftMaster 98022 is a cutting-edge wall-mount WiFi garage door opener designed for convenience, security, and space-saving installation. This model distinguishes itself with a remarkably quiet operation, making it ideal for attached garages or homes near neighbors. It seamlessly integrates with smart home technology, offering control via the MyQ app, allowing users to monitor and operate their garage door from anywhere with an internet connection.
This opener isn’t just about remote access; it’s about enhanced safety features and a sleek, modern design. The included Quick Start Guide provides a basic overview, but a comprehensive understanding requires consulting the full manual, available in English, French, and Spanish as a free PDF download. The 98022 is a significant upgrade for those seeking a reliable and intelligent garage door solution, offering a blend of performance and peace of mind.
Key Features and Benefits
The LiftMaster 98022 boasts several key features enhancing garage door operation. Its wall-mount design maximizes headroom, ideal for garages with limited space. Integrated WiFi connectivity enables control through the MyQ app, providing real-time monitoring and remote access. This allows users to open, close, and receive alerts regarding garage door activity from smartphones or tablets.
Beyond convenience, the 98022 prioritizes security. Compatibility with MyQ allows for secure access control and integration with other smart home devices. The quiet operation, a significant benefit, minimizes noise disturbance. Detailed manuals (available as PDF downloads) outline features like adding a wired button, though wiring specifics require careful attention. Upgrading to this model delivers a blend of smart technology, safety, and a space-efficient design, improving daily convenience and peace of mind;
Safety Precautions
Prioritize safety during installation and operation of the LiftMaster 98022. Always disconnect power before performing any maintenance or wiring adjustments. The manual emphasizes that a safe door system is the responsibility of the purchaser, designer, and installer. Never allow children to operate the garage door or play near it.
Regularly test safety features like the auto-reverse function, ensuring it correctly reverses the door when encountering an obstruction. Inspect the door’s balance regularly; an unbalanced door poses a significant hazard. Refer to the comprehensive PDF manual for detailed safety guidelines and warnings. Incorrect wiring, as highlighted in online forums regarding adding wired buttons, can compromise safety. Adhering to these precautions is crucial for preventing accidents and ensuring the long-term safe operation of your garage door system.

Installation Guide
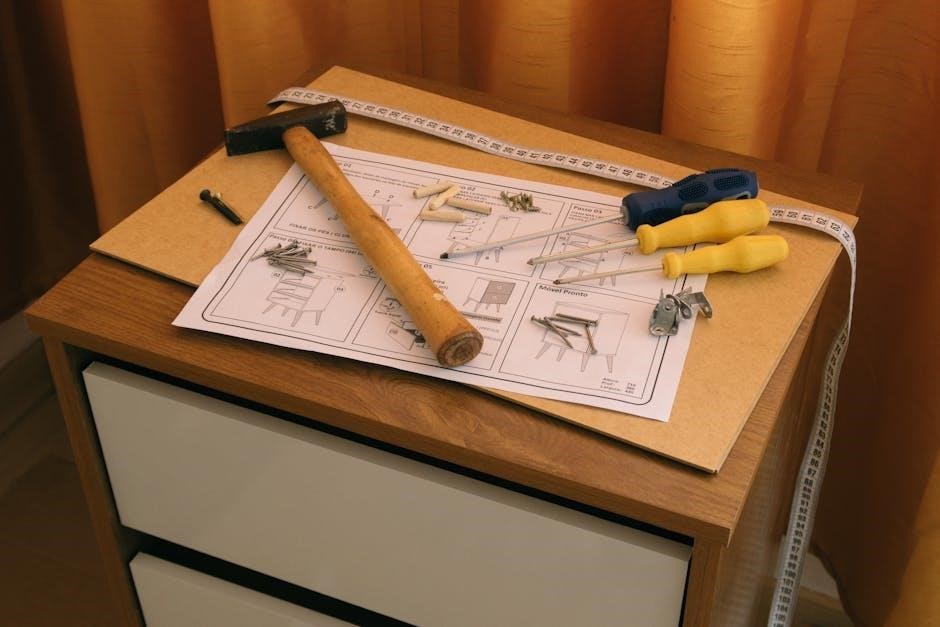
Follow the manual for proper LiftMaster 98022 installation, including unboxing, mounting, door connection, and power wiring. A Quick Start Guide is also available.
Unboxing and Component Checklist
Upon receiving your LiftMaster 98022, carefully inspect the box for any shipping damage. Once opened, verify all components are present before proceeding with installation. The package should include the garage door opener unit itself, a remote control (typically one or more), a multi-function control panel, mounting hardware – brackets, bolts, and screws – and a user manual.
Specifically, check for the hardware bag (part number 041A6298-5). Ensure the power cable is included, along with any necessary safety labels and documentation. A quick visual inspection will confirm the presence of the chain or belt drive system, depending on the model variation.
Refer to the included parts list within the manual to cross-reference each item. If any components are missing or damaged, immediately contact LiftMaster customer support for replacements. Do not attempt to install the opener with incomplete or faulty parts, as this could compromise safety and performance.
Mounting the Opener Unit
Mounting the LiftMaster 98022 requires secure attachment to ceiling joists or a solid mounting surface within your garage. Begin by identifying suitable mounting locations, ensuring adequate clearance around the opener for operation. Utilize the provided mounting brackets, carefully aligning them with the ceiling joists.
Securely fasten the brackets using lag screws or bolts appropriate for your ceiling construction. It’s crucial to use hardware capable of supporting the opener’s weight and resisting vibrations during operation. Once the brackets are firmly in place, carefully lift the opener unit and align it with the mounted brackets.
Ensure the opener sits securely on the brackets before tightening any securing bolts. Double-check the stability of the entire assembly, verifying there is no wobble or movement. Proper mounting is paramount for safe and reliable operation of your LiftMaster 98022.
Connecting to the Garage Door
Connecting the LiftMaster 98022 to your garage door involves attaching the drive system – either a chain or belt – to the door itself. First, ensure the garage door is fully closed and secured. Attach the door bracket to the top section of the garage door, centering it for balanced operation.
Next, connect the opener’s drive system to the door bracket using the provided arm. Adjust the arm’s length to ensure proper alignment and smooth door travel. The arm should be positioned to pull the door straight up, avoiding any twisting or binding.
Carefully test the connection by manually lifting and lowering the door, observing the arm’s movement. Fine-tune the arm’s adjustment as needed to achieve optimal performance. A properly connected drive system is essential for safe, efficient, and reliable garage door operation with your LiftMaster 98022.
Wiring the Power Supply
Wiring the LiftMaster 98022 requires careful attention to electrical safety. Always disconnect power at the circuit breaker before beginning any wiring work. Locate the opener’s power supply terminals, typically found within the control panel housing. Connect the black (hot) wire to the corresponding terminal, the white (neutral) wire to its designated terminal, and the green (ground) wire to the grounding screw.
Ensure all connections are secure and properly insulated to prevent shorts or electrical hazards. Double-check the wiring against the unit’s wiring diagram, found within the manual, to confirm correct connections.
Once wiring is complete, restore power at the circuit breaker. Test the opener’s functionality to verify proper operation. If issues arise, immediately disconnect power and re-examine the wiring. Professional installation is recommended if you are uncomfortable with electrical work.

Programming and Setup
Setup involves initial adjustments, remote control programming, MyQ app integration for smart control, and precisely setting travel limits for safe, efficient operation.
Initial Setup and Adjustment
Begin by ensuring the garage door is balanced and moves freely. Disconnect any existing opener before proceeding. Attach the chain or belt to the garage door, verifying proper alignment. The LiftMaster 98022 requires careful adjustment of the force settings to prevent damage or injury.
Adjust the up and down travel limits using the adjustment screws on the opener unit. These controls dictate how far the door opens and closes. Fine-tune these settings until the door reaches the desired fully open and fully closed positions. Pay close attention to safety sensors; ensure they are correctly aligned and functioning.
Test the door’s operation frequently during adjustment. Observe for any obstructions or unusual noises. The goal is smooth, consistent movement without excessive force; Refer to the full manual for detailed diagrams and troubleshooting tips if adjustments prove difficult. Proper initial setup is crucial for long-term performance and safety.
Remote Control Programming
To program a remote control with your LiftMaster 98022, begin by pressing the “Learn” button on the opener unit – it’s typically yellow or orange. This activates a two-minute window for programming. Within this timeframe, press and hold the desired button on the remote control until the garage door opener light flashes, indicating successful programming.
For multiple remotes, repeat the process for each one. If programming fails, ensure the remote has fresh batteries and is within range of the opener. Some models may require clearing existing remote codes before adding new ones; consult the manual for specific instructions.
MyQ-enabled openers allow remote control programming through the MyQ app, offering convenient control from anywhere. Always test each remote after programming to confirm functionality. If issues persist, refer to the troubleshooting section of the manual or contact LiftMaster support for assistance.
MyQ App Integration
The LiftMaster 98022 seamlessly integrates with the MyQ app, providing smartphone control of your garage door. Download the MyQ app from your app store and create an account. To connect, ensure your opener is connected to a WiFi network – the app guides you through this process.
Once connected, you can open, close, and monitor your garage door from anywhere with an internet connection; MyQ also allows you to set up alerts for door activity, granting peace of mind. You can grant access to family members or guests, and even integrate with other smart home devices.
The app provides real-time status updates and a history of door operations. Troubleshooting assistance and access to the opener’s manual are also available within the MyQ app. Ensure your opener’s firmware is up-to-date for optimal performance and security;
Setting Travel Limits
Properly setting travel limits is crucial for safe and efficient operation of your LiftMaster 98022. These limits define how far the door opens and closes, preventing damage to the door or opener. Access the travel limit adjustments via the control panel on the opener unit.
Begin by adjusting the ‘up’ travel limit. Slowly increase the setting until the door reaches its fully open position. Then, adjust the ‘down’ travel limit, ensuring the door closes completely without reversing prematurely. Small adjustments are recommended for precision.
Test the limits thoroughly after each adjustment. Observe the door’s movement and listen for any unusual sounds. Fine-tune the settings as needed to achieve smooth and reliable operation. Incorrectly set limits can cause the door to reverse unexpectedly or fail to close fully.
Operation and Troubleshooting
This section details normal operation, common issues, error code diagnosis, and opener reset procedures for the LiftMaster 98022, ensuring smooth garage door functionality.
Operating the Garage Door
The LiftMaster 98022 offers several convenient ways to operate your garage door. Standard operation involves using the included remote control, pressing the wall-mounted push button, or utilizing the MyQ app on your smartphone. To activate the door with the remote, simply press the corresponding button – a single press initiates opening or closing.
The wall button functions similarly, providing a localized control option. However, the true power lies within the MyQ app. This allows remote access from anywhere with an internet connection, enabling you to monitor door status, receive alerts, and grant access to others.
Safety features are paramount; the opener incorporates safety sensors to prevent the door from closing on obstructions. Always ensure these sensors are aligned and unobstructed for optimal performance. Regular testing of these sensors is highly recommended. Familiarize yourself with the manual’s safety guidelines to ensure safe and reliable operation of your LiftMaster 98022.
Troubleshooting Common Issues
Encountering issues with your LiftMaster 98022? Several common problems have straightforward solutions. If the door doesn’t respond, first check the power supply and ensure the outlet is functioning. A non-responsive remote often indicates a low battery – replace it and reprogram if necessary. If the door reverses unexpectedly, inspect the safety sensors for obstructions or misalignment; clean the lenses and realign them properly.
For MyQ app connectivity problems, verify your WiFi connection and ensure the opener is properly linked to your account. If the opener hums but doesn’t move the door, the issue might be with the travel limits – refer to the programming section of the manual for adjustment instructions.
Consult the manual for a comprehensive list of error codes and their corresponding solutions. Remember to disconnect power before attempting any repairs beyond basic troubleshooting. If problems persist, contact a qualified garage door technician.
Diagnosing Error Codes
The LiftMaster 98022 utilizes error codes to pinpoint specific issues within the system. These codes, displayed via flashing LEDs on the opener unit, provide valuable diagnostic information. A flashing LED indicates a problem requiring attention. For example, a rapid flash might signal a safety sensor issue, while a slower flash could indicate a limit switch problem.
Refer to the manual for a complete decoding of each error code. The manual details the specific meaning of each code and provides step-by-step instructions for resolving the associated issue. Common errors include obstructions detected by the safety sensors, incorrect travel limit settings, or motor overload protection activation.
Carefully note the flashing pattern – the number of flashes and their duration – to accurately identify the error. Addressing these codes promptly ensures optimal performance and prevents further damage to the garage door opener system.
Resetting the Opener
Resetting the LiftMaster 98022 can resolve various operational issues, restoring the opener to its factory default settings. This process clears existing programming, including remote controls and MyQ app connections, requiring re-programming afterward. Before resetting, ensure the garage door is clear of obstructions and that you have access to a stepladder for safe operation.

The reset procedure typically involves disconnecting power to the opener for a specified duration – usually 30 seconds – then reconnecting it. Following this, a specific sequence of button presses on the opener unit or wall control may be required, as detailed in the official manual.
Caution: Resetting will erase all customized settings. Consult the manual for precise instructions tailored to your model. A successful reset is indicated by a specific LED behavior. Re-program remotes and the MyQ app after the reset is complete.

Maintenance and Repair
Regular maintenance, including lubrication and tension adjustments, ensures optimal performance. The LiftMaster 98022 manual details these tasks, alongside battery replacement instructions and repair guidance.
Regular Maintenance Tasks
Consistent upkeep is crucial for the longevity and smooth operation of your LiftMaster 98022 garage door opener. The comprehensive manual emphasizes several key tasks to perform periodically. Firstly, visually inspect the entire system – door, tracks, springs, and opener unit – for any signs of wear, damage, or loose components. Pay close attention to the hinges and rollers, ensuring they move freely.
Secondly, check the alignment of the safety sensors. These are vital for preventing accidental closures and must be unobstructed and correctly positioned. Regularly test the safety reversal system by placing an object in the door’s path while closing. The door should immediately reverse. Finally, examine the wiring connections, ensuring they are secure and free from corrosion. Following these regular maintenance tasks, as outlined in your LiftMaster 98022 manual, will help prevent costly repairs and ensure years of reliable service.
Lubrication Guide
Proper lubrication is essential for maintaining the quiet operation and extending the lifespan of your LiftMaster 98022 garage door opener. The manual recommends using a lithium-based grease for all moving parts. Begin by lubricating the hinges, rollers, and springs along the garage door tracks. Apply sparingly, wiping away any excess to prevent dirt accumulation;
Next, lubricate the opener’s chain or belt – if applicable – ensuring even distribution. Avoid using oil-based lubricants, as they can attract dust and grime. The trolley, which moves along the rail, also benefits from regular greasing. Crucially, do not lubricate the door’s track itself, as this can hinder the safety sensors. Refer to your LiftMaster 98022 manual for specific diagrams and recommendations. Consistent lubrication, as detailed in the guide, minimizes friction, reduces wear, and ensures smooth, reliable performance.
Belt/Chain Tension Adjustment
Maintaining correct tension in the belt or chain is vital for optimal performance of your LiftMaster 98022. A loose belt or chain can cause slipping, noise, and reduced lifting power, while excessive tension strains the motor. The manual details specific adjustment procedures based on your opener’s configuration.
Typically, tension is adjusted using turnbuckles or similar mechanisms located along the rail. Loosen the locking nuts, then adjust the turnbuckles to increase or decrease tension. The belt or chain should have minimal slack, but not be overly tight. Carefully check the alignment of the rail and ensure it’s securely mounted. Refer to the LiftMaster 98022 manual diagrams for precise instructions and torque specifications. Regular inspection and adjustment, as outlined in the guide, will prevent premature wear and ensure smooth, quiet operation.
Replacing the Battery
Maintaining a functional battery in your LiftMaster 98022 ensures continued operation during power outages and preserves programmed settings. The battery is typically located within the opener unit’s control panel. Consult your LiftMaster 98022 manual for the exact location and battery type required – usually a 9V battery.
To replace the battery, first disconnect the opener from the power supply. Carefully remove the old battery, noting the correct polarity (+ and -). Install the new battery, ensuring proper alignment. Reconnect the power and verify the battery backup is functioning correctly. The manual may include instructions for testing the backup system. Regularly check the battery’s condition, as indicated by the opener’s indicator lights, and replace it proactively to avoid losing settings or functionality during an outage.

Technical Specifications
The LiftMaster 98022 boasts specific dimensions, weight, and power requirements detailed in its manual. Compatibility information and warranty details are also provided for reference.
Dimensions and Weight
Understanding the physical specifications of the LiftMaster 98022 is crucial for ensuring a proper installation and confirming compatibility with your garage space. The opener unit is designed with a compact profile, making it ideal for areas with limited headroom. While precise measurements can vary slightly, the unit generally measures approximately 9.5 inches in height, 11.5 inches in width, and 7.5 inches in depth.
Regarding weight, the LiftMaster 98022 is relatively lightweight, typically weighing around 18.5 pounds. This manageable weight simplifies the mounting process and reduces the strain on supporting structures. These dimensions and weight are important considerations when planning the installation, ensuring sufficient clearance and adequate support for the opener. Always refer to the official LiftMaster 98022 manual for the most accurate and up-to-date specifications, as these details can be subject to change.
Power Requirements
Ensuring correct power supply is vital for the safe and efficient operation of your LiftMaster 98022 garage door opener. This model is designed to operate on a standard 120-volt, 60Hz electrical supply, commonly found in most North American households. A dedicated 15-amp circuit is recommended to prevent overloading and ensure reliable performance.

The opener does not require a neutral wire for operation, simplifying installation in some garages. However, a properly grounded outlet is absolutely essential for safety. Avoid using extension cords, as they can reduce power and pose a fire hazard. Always consult a qualified electrician if you are unsure about your garage’s electrical setup or if modifications are needed. Refer to the official LiftMaster 98022 manual for detailed wiring diagrams and safety precautions regarding power connections.
Compatibility Information
The LiftMaster 98022 is engineered for compatibility with a wide range of garage door types, including sectional doors, single-panel doors, and double-door systems; However, certain door characteristics can influence optimal performance. It’s crucial to verify your door’s weight and balance before installation; the opener is designed for doors weighing up to 350 pounds.
This model seamlessly integrates with LiftMaster’s MyQ technology, enabling smartphone control and monitoring. It’s also compatible with a variety of LiftMaster accessories, such as remote controls and wireless keypads. Ensure your existing wiring is suitable, as the 98022 doesn’t always require a neutral wire. Consult the comprehensive manual for detailed compatibility charts and potential limitations based on your specific garage door setup. Proper compatibility ensures smooth operation and maximizes the benefits of your LiftMaster system.
Warranty Details
LiftMaster provides a comprehensive warranty for the 98022 garage door opener, offering peace of mind to homeowners. The opener itself is typically covered by a lifetime warranty against defects in materials and workmanship, ensuring long-term reliability. However, specific warranty terms can vary based on the date of purchase and the region.
Motors, gears, and electronic components generally receive extended warranty coverage, while parts like lamps and lenses may have a shorter warranty period. Proper installation by a qualified professional is often required to validate the warranty. Retain your proof of purchase and register your product online to streamline any potential warranty claims. Refer to the official LiftMaster warranty documentation, available online or within the product manual, for complete details and limitations.