
Honeywell Pro Series Thermostat Installation Manual: A Comprehensive Plan
This manual provides a detailed, step-by-step guide for installing your new Honeywell Pro Series smart thermostat, ensuring a smooth and efficient upgrade process.
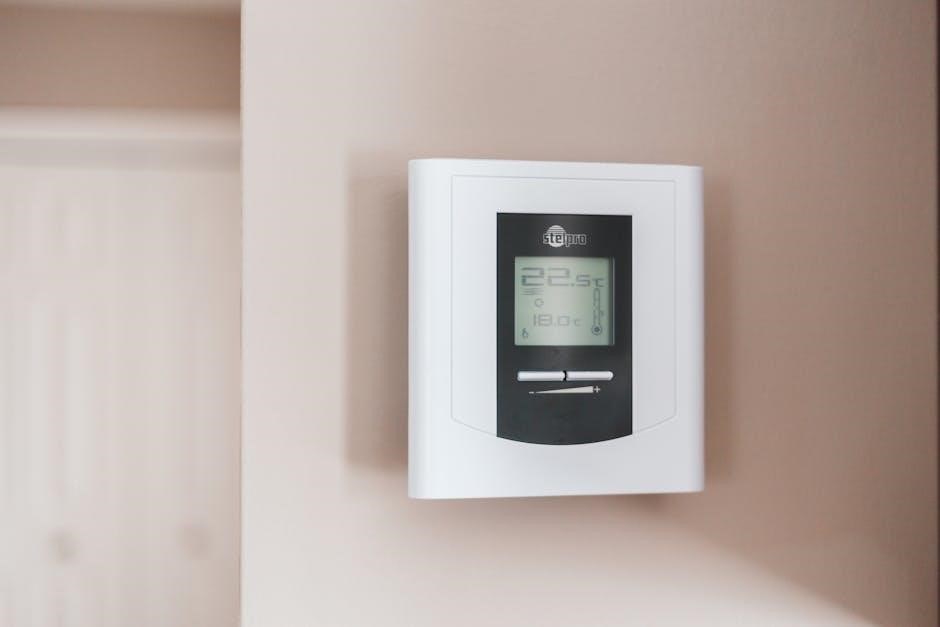
Welcome to the world of smart home comfort with the Honeywell Pro Series Thermostat! This innovative thermostat is designed to provide precise temperature control, energy savings, and convenient remote access through the Honeywell Home app. It seamlessly integrates into your existing HVAC system, offering a user-friendly experience for both basic and advanced users.
The Pro Series boasts a sleek, modern design that complements any home décor. Beyond aesthetics, it delivers intelligent features like smart learning, geofencing, and customizable scheduling. This manual will guide you through every stage of installation, from verifying package contents to connecting to your Wi-Fi network. Our experts will help you make key checks and provide helpful tips for an easier process.
Package Contents & Verification
Before beginning installation, carefully verify the contents of your Honeywell Pro Series thermostat package. You should find the thermostat display unit, a mounting base plate, screws and wall anchors for secure installation, and a detailed installation guide – this document!
Additionally, check for wire labels to aid in identifying existing wiring, and potentially a screwdriver (depending on the model). Crucially, confirm the presence of all listed items. If anything is missing or appears damaged, do not proceed. Contact Honeywell Support immediately for assistance and replacement parts. Proper verification ensures a smooth installation process and avoids potential delays or complications later on.
Safety Precautions
Prioritizing safety is paramount during thermostat installation. Always disconnect power to your HVAC system at the breaker box before handling any wiring. Failure to do so presents a serious risk of electrical shock. If you are uncomfortable working with electrical wiring, consult a qualified HVAC technician.
Wear appropriate safety glasses to protect your eyes. Be mindful of potential hazards like sharp wires or edges. Keep the thermostat and its components out of reach of children. Never attempt to repair the thermostat yourself; contact Honeywell for authorized service. Following these precautions will ensure a safe and successful installation.
Tools Required for Installation
Proper tools streamline the Honeywell Pro Series thermostat installation process. You will need a Phillips head screwdriver – both standard and stubby – for accessing and securing screws. A flathead screwdriver may also be useful. Wire strippers are essential for preparing the existing thermostat wires for connection.
A small level ensures the thermostat base plate is mounted straight, improving aesthetics and functionality. Pliers can assist with wire manipulation. A voltage tester verifies power is off before working with wires. A digital multimeter is helpful for troubleshooting. Finally, a pencil for marking wire labels and a drill with appropriate bits may be needed for mounting.
Understanding Your HVAC System Compatibility
Ensuring compatibility is crucial before installing your Honeywell Pro Series thermostat. Most systems are compatible, but verifying specifics prevents issues. The Pro Series supports common 24V heating and cooling systems.
Gas furnaces are generally compatible, requiring a common (C) wire for consistent power. Electric furnaces also typically work seamlessly. Heat pump systems require careful attention to the O/B wire configuration – determining if your system uses O or B wiring is vital. Systems with line voltage (120V/240V) or proprietary communication protocols may not be compatible; consult Honeywell’s compatibility checker online.

Compatibility with Gas Furnaces
Honeywell Pro Series thermostats are broadly compatible with most standard gas furnaces. However, a consistent 24VAC power supply is essential for optimal performance. This usually means a ‘C-wire’ (common wire) is required.
If your existing thermostat doesn’t have a C-wire, you may need to run a new wire or utilize a C-wire adapter (sold separately). The Pro Series supports single-stage, two-stage, and modulating gas furnaces. Verify your furnace’s control board voltage before installation. Incorrect wiring can damage your furnace or thermostat; always double-check connections.
Compatibility with Electric Furnaces
The Honeywell Pro Series thermostat generally works well with most electric furnaces, particularly those operating on a standard 24VAC system. Like gas furnaces, a stable power supply is crucial, often necessitating a ‘C-wire’ connection.
If a C-wire isn’t present, consider installing one or using a compatible adapter. The Pro Series supports single-stage and multi-stage electric furnaces. Ensure your furnace’s voltage matches the thermostat’s requirements. Improper wiring can lead to malfunction or damage. Always consult a qualified HVAC technician if you’re unsure about your system’s compatibility or wiring configuration.
Compatibility with Heat Pumps
Honeywell Pro Series thermostats are widely compatible with various heat pump systems, including those with auxiliary heat. However, proper wiring is critical for correct operation, especially concerning the O/B wire. This wire controls the reversing valve, switching between heating and cooling modes.

Determine if your heat pump uses an ‘O’ wire (cooling energizes the valve) or a ‘B’ wire (heating energizes the valve). Incorrect configuration will result in reversed heating and cooling. The Pro Series allows you to select the appropriate setting during installation. Always verify your existing wiring and consult the heat pump’s documentation or a professional if unsure.
Turning Off Power to Your HVAC System
Before beginning any wiring work, completely disconnect power to your heating and cooling system at the breaker box. This is a crucial safety precaution to prevent electrical shock and potential damage to the thermostat or HVAC equipment. Locate the breaker labeled “Furnace” or “HVAC” – it may be labeled differently depending on your setup.
Flip the breaker to the “OFF” position. To confirm power is off, use a non-contact voltage tester on the wires at your old thermostat. If the tester doesn’t indicate voltage, it’s safe to proceed. Never work with live wires! If you are uncomfortable with this step, consult a qualified electrician.
Removing Your Old Thermostat
Carefully remove the cover of your existing thermostat. This usually involves gently prying it off or releasing a clip; Before disconnecting any wires, meticulously label each wire with the corresponding terminal letter on the old thermostat’s baseplate. Use the provided wire labels – accurate labeling is vital for correct installation.
Take a clear photograph of the wiring as a backup reference. Then, disconnect each wire one at a time, ensuring it doesn’t slip back into the wall. Gently pull the wires straight out; do not bend or force them. Once all wires are disconnected, remove the old thermostat baseplate from the wall.
Labeling Existing Wires
Accurate wire labeling is the most crucial step before disconnecting anything. Use the small, adhesive labels included with your Honeywell Pro Series thermostat kit. Carefully note the letter designation printed next to each terminal screw on your old thermostat’s baseplate – R, C, W, Y, G, and potentially O/B.
Attach a corresponding label to each wire before you disconnect it. Wrap the label securely around the wire, ensuring the letter is clearly visible. Double-check your work; a misplaced label can cause significant issues later. If wires are bundled, separate them gently to apply labels individually. A photograph is also recommended as a backup.
Disconnecting Wires – A Step-by-Step Guide
With the power OFF, gently loosen the screws on your old thermostat’s baseplate, one at a time. Carefully pull each labeled wire free from its terminal. Avoid pulling on the wire itself; instead, grasp the insulated jacket near the terminal.
As you disconnect each wire, verify the label matches the terminal it was connected to. Do not allow the wires to fall back into the wall! A slight bend in the wire can help keep it accessible. If a wire is difficult to remove, double-check the screw is fully loosened. Proceed slowly and methodically to avoid confusion.
Mounting the Honeywell Pro Series Thermostat Base Plate
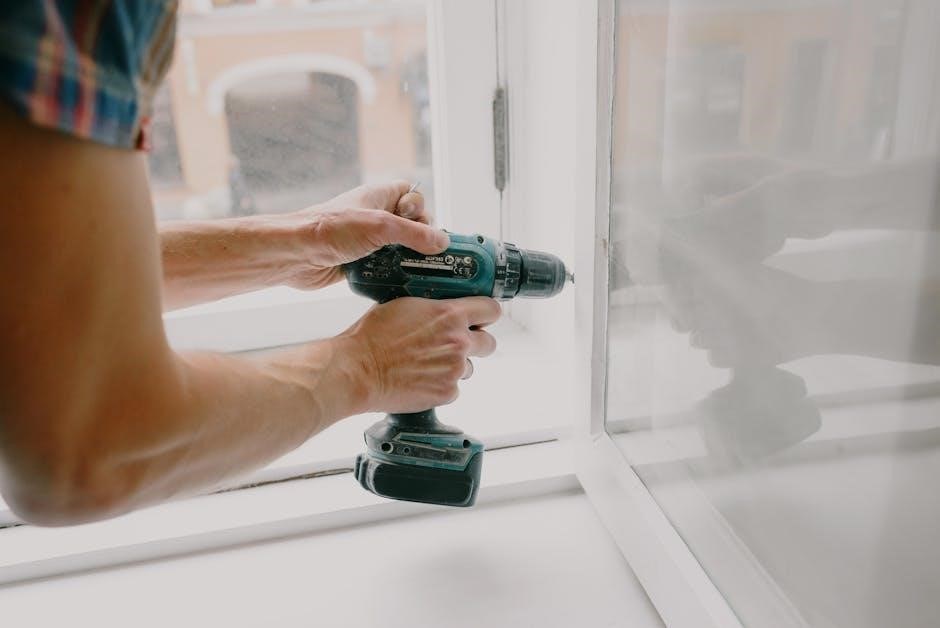
Position the Honeywell Pro Series base plate on the wall where your old thermostat was located, ensuring it covers the existing mounting holes. Use a level to confirm the base plate is perfectly straight.
Mark the screw holes with a pencil. If new holes are needed, drill pilot holes appropriate for the provided wall anchors. Insert the wall anchors if drilling into drywall. Secure the base plate to the wall using the provided screws, tightening them until snug, but not overtightened. A secure mount is crucial for proper operation and aesthetics.
Wiring the Honeywell Pro Series Thermostat
Carefully connect the wires to the corresponding terminals on the Honeywell Pro Series base plate. Refer to the wiring diagram and your labeled wires from the old thermostat. Ensure each wire is securely inserted into its terminal – a loose connection can cause malfunctions.
Double-check all connections before proceeding. Pay close attention to the C-wire (common wire), which is often blue and essential for powering the thermostat. If you lack a C-wire, consult the manual for alternative wiring options or a C-wire adapter. A correct wiring setup is vital for optimal performance.
Common Wiring Configurations (R, C, W, Y, G)
Understanding these wires is crucial for successful installation. R (Red) provides power, while C (Common) completes the circuit, often necessary for smart thermostat operation. W (White) activates heating, Y (Yellow) controls cooling, and G (Green) manages the fan.
These are the most frequent configurations, but variations exist. Always verify against your existing thermostat’s wiring and the Honeywell Pro Series manual. Incorrect wiring can damage your HVAC system or the thermostat itself. Carefully match the wire colors to the corresponding terminals on the base plate.
Identifying and Connecting the C-Wire (Common Wire)
The C-wire (Common wire) is often blue, but can sometimes be other colors. It provides continuous power to the thermostat, essential for consistent operation and Wi-Fi connectivity. If you don’t see a C-wire, don’t proceed without consulting the manual or a professional.
Some systems require a C-wire adapter, included with certain Honeywell Pro Series models. Carefully follow the adapter’s instructions for proper installation. Connecting the C-wire correctly prevents power-related issues and ensures reliable performance. Double-check the connection before attaching the thermostat display.
Wiring for Heat Pump Systems (O/B Wire)
Heat pump systems utilize an O/B wire to control reversing valve operation, switching between heating and cooling modes. Determining whether your system uses O or B wiring is crucial; consult your HVAC documentation. The Honeywell Pro Series allows configuration for both O and B wire setups.
Incorrect wiring can result in reversed heating and cooling. Carefully label the existing wire before disconnecting it. During installation, select the appropriate O/B setting within the thermostat’s menu. Proper configuration ensures your heat pump operates efficiently and delivers comfortable temperatures year-round.
Attaching the Thermostat Display to the Base Plate
Once the wiring is securely connected to the base plate, carefully align the thermostat display with the corresponding mounting points. Gently press the display onto the base plate until it clicks into place, ensuring a firm and stable connection. Avoid forcing the display, as this could damage the internal components or wiring.
Verify the display is properly seated and level before proceeding. A secure attachment is essential for reliable operation and prevents accidental disconnections. Double-check all connections visually before restoring power to the system, ensuring a safe and functional installation.
Powering On and Initial Setup

After securely attaching the display, restore power to your HVAC system at the breaker box. The Honeywell Pro Series thermostat should power on automatically, displaying the welcome screen. Follow the on-screen prompts to begin the initial setup process. This typically involves selecting your language, date, and time settings.
The thermostat will guide you through a series of questions to identify your HVAC system type – furnace, heat pump, or others. Accurate system identification is crucial for proper operation. Take your time and answer carefully. The initial setup prepares the thermostat for optimal performance and connectivity.
Connecting to Wi-Fi
To unlock the smart features of your Honeywell Pro Series thermostat, connect it to your home’s Wi-Fi network. From the thermostat’s settings menu, navigate to the network options and select “Connect to Wi-Fi.” The thermostat will scan for available networks. Choose your network from the list and enter your password when prompted.
Ensure a strong Wi-Fi signal for reliable connectivity. A stable connection is essential for remote control, software updates, and utilizing features like geofencing. Once connected, the thermostat will display a confirmation message. Successful Wi-Fi connection enables full access to the Honeywell Home app.
Registering Your Thermostat
Registering your Honeywell Pro Series thermostat unlocks access to exclusive features and support resources. Download the Honeywell Home app on your smartphone or tablet and create an account, if you don’t already have one. Within the app, select “Add a Device” and follow the on-screen instructions.
You’ll likely need the thermostat’s model number and serial number, typically found on the device itself or its packaging. Registration links your thermostat to your account, enabling remote control, usage tracking, and access to customer support. A registered thermostat also ensures you receive important software updates.
Programming Your Thermostat – Basic Settings
Initial programming establishes the foundation for comfortable and efficient climate control. Begin by setting the correct date and time within the thermostat’s menu or the Honeywell Home app – accurate timekeeping is crucial for scheduling. Next, create a schedule that aligns with your daily routine, defining different temperature settings for wake, leave, return, and sleep periods.
Consider using pre-set schedules or customizing them to perfectly match your lifestyle. Experiment with temperature adjustments to find the optimal balance between comfort and energy savings. Regularly review and refine your schedule as your needs evolve, maximizing the thermostat’s potential.
Setting Date and Time
Accurate date and time settings are fundamental for proper thermostat operation, especially when utilizing scheduling features. Access the settings menu on your Honeywell Pro Series thermostat display, typically through a button labeled “Menu” or a similar icon. Navigate to the “Date & Time” option, often found within the “Settings” or “System” sections.
Use the touchscreen or navigation buttons to adjust the month, day, and year. Similarly, set the current time, ensuring you select the correct AM or PM designation. Confirm your selections to save the changes; the thermostat will then operate based on this accurate time reference.
Creating a Schedule
Leverage the scheduling function to optimize energy usage and comfort. Access the “Schedule” option within the thermostat’s menu, often allowing for customized settings for each day of the week. Define different “periods” – such as Wake, Leave, Return, and Sleep – and assign desired temperatures to each.
Utilize the touchscreen or buttons to set the start time and temperature for each period. Consider your daily routine when programming the schedule, ensuring temperatures align with occupancy. Save your schedule, and the thermostat will automatically adjust temperatures based on your preferences, maximizing efficiency and comfort.
Advanced Features & Settings
Explore the Pro Series’ advanced capabilities for a truly personalized experience. Delve into settings like “System Mode” to select Heat, Cool, Auto, or Off. Adjust fan settings – Auto or On – to control air circulation. Customize display preferences, including brightness and screen timeout.
Unlock features like filter change reminders, ensuring optimal HVAC performance. Investigate options for swing temperature adjustment, fine-tuning comfort levels. Familiarize yourself with holiday scheduling, overriding regular schedules for extended absences. These settings empower you to tailor the thermostat to your specific needs and maximize energy savings.
Geofencing Configuration
Geofencing utilizes your smartphone’s location to automatically adjust the thermostat. Define a virtual perimeter around your home within the Honeywell Home app. When you exit the geofence, the thermostat can switch to an energy-saving Away mode. Upon re-entry, it returns to your preferred Comfort settings.
Customize the geofence radius to suit your lifestyle. Configure multiple users for shared location awareness. Adjust temperature setpoints for both Home and Away modes. Ensure location services are enabled on your smartphone for accurate tracking. Geofencing provides convenient, automated climate control, optimizing comfort and reducing energy consumption.
Smart Learning Features
The Honeywell Pro Series thermostat learns your heating and cooling preferences over time, creating a personalized schedule. It observes your adjustments and automatically adapts to your routine, optimizing comfort and energy savings. Enable the “Smart Learning” feature within the Honeywell Home app to activate this functionality.
The thermostat analyzes your temperature adjustments throughout the week. It identifies patterns and proactively adjusts the schedule to match your lifestyle. Review and refine the suggested schedule as needed. Smart Learning minimizes manual programming, providing a truly intelligent and automated climate control experience.
Troubleshooting Common Installation Issues
If the thermostat doesn’t power on, double-check the C-wire connection and ensure the HVAC system’s power is fully off during wiring. For Wi-Fi connectivity problems, verify your network password and router compatibility. If the display is unresponsive, try a soft reset by removing and reattaching the thermostat display.
Incorrect temperature readings may indicate improper thermostat placement or calibration issues. Wiring errors can cause system malfunctions; carefully review the wiring diagram. Consult the Honeywell Home app for specific error codes and troubleshooting steps. If issues persist, contact Honeywell support for assistance.
Resetting Your Honeywell Pro Series Thermostat
A soft reset restarts the thermostat without losing settings; detach the display from the baseplate for 10 seconds, then reattach. For a factory reset – erasing all personal settings – navigate to the settings menu on the thermostat display. Select “Reset” or “Factory Defaults” and confirm your choice.
Understanding Error Codes
Your Honeywell Pro Series thermostat utilizes error codes to diagnose system issues. These codes appear on the display, offering clues about the problem. Common codes include “E1” (loss of power to the thermostat), “E2” (loss of communication with the HVAC system), and “E3” (sensor malfunction).
Consult the Honeywell Home app or the full installation manual for a comprehensive list of error codes and their meanings. Attempting to resolve issues based solely on error codes is not recommended; professional HVAC assistance may be required. Document the error code before contacting support for faster assistance.
Maintaining Your Thermostat
Regular maintenance ensures optimal performance of your Honeywell Pro Series thermostat. Periodically dust the thermostat display with a soft, dry cloth to maintain clarity. Avoid using liquid cleaners or abrasive materials, as these can damage the screen.
Check the thermostat’s mounting periodically to ensure it remains securely attached to the wall. Verify that the surrounding area is free from obstructions that could interfere with airflow. Consider replacing the batteries (if applicable) annually to prevent unexpected power loss. Routine care extends the lifespan and reliability of your device.
Honeywell Home App Overview
The Honeywell Home app is central to controlling your Pro Series thermostat remotely. After registration, the app allows you to adjust temperature settings, create and modify schedules, and monitor energy usage from anywhere with an internet connection.
Explore features like geofencing, which automatically adjusts the temperature based on your location, and smart learning, which adapts to your preferences. Receive alerts for extreme temperatures or system malfunctions. The app provides a user-friendly interface for managing your home comfort efficiently and conveniently, maximizing energy savings.
Firmware Updates
Regular firmware updates are crucial for maintaining optimal performance and security of your Honeywell Pro Series thermostat. These updates, delivered automatically via Wi-Fi, introduce new features, improve system stability, and address potential vulnerabilities.
The Honeywell Home app will typically notify you when an update is available. It’s recommended to allow the update to install during off-peak hours to avoid any temporary disruptions. Ensuring your thermostat has the latest firmware guarantees compatibility and access to the newest enhancements, providing a consistently reliable and secure smart home experience.
Warranty Information
Your Honeywell Pro Series thermostat is covered by a limited warranty against defects in materials and workmanship. The standard warranty period is typically one year from the date of purchase, though extended warranties may be available. This warranty covers repair or replacement of the defective unit, at Honeywell’s discretion.
To make a warranty claim, retain your proof of purchase and contact Honeywell Customer Support. The warranty does not cover damage resulting from improper installation, misuse, or unauthorized modifications. Refer to the separate warranty document included in the product packaging for complete details and limitations.
Contacting Honeywell Support
For assistance with your Honeywell Pro Series thermostat installation or operation, several support channels are available. You can visit the Honeywell Home website for a comprehensive FAQ section, troubleshooting guides, and downloadable resources. Alternatively, you can reach Honeywell Customer Support via phone during business hours; check the website for current contact numbers.
Live chat support is often offered through the Honeywell Home website, providing immediate assistance from a trained representative. Social media channels may also offer support options. When contacting support, have your thermostat model number and date of purchase readily available for faster service.