
Daikin Air Conditioning Remote Control Manual: A Comprehensive Guide
Navigating Daikin’s cooling systems requires understanding remote functions, troubleshooting errors like U4, and ensuring compatibility across models—Siesta, Perfera, and Stylish․
Understanding Your Daikin Remote Control
Your Daikin remote is the central command for comfort, offering precise control over your air conditioning system․ Familiarizing yourself with its layout and functions is crucial for optimal performance․ Different Daikin models – including Siesta, Perfera, and Stylish – feature slightly varied remote designs, but core functionalities remain consistent․
Generally, the remote displays a screen showing the current temperature, set temperature, and operating mode․ Buttons allow you to power the unit on/off, adjust the temperature, select modes (Cool, Heat, Auto, Dry, Fan), control fan speed, and adjust airflow direction․
Understanding the indicator lights is also key; they signal the unit’s status and any potential issues․ Many newer models offer advanced features accessible through the remote, such as timer settings and even connectivity to the Daikin mobile app for remote control via smartphone․ Proper use ensures efficient and personalized climate control․
Remote Control Model Variations
Daikin offers several remote control models, each tailored to specific air conditioning unit series․ The Daikin Siesta remote, found with entry-level units, provides basic functionality – temperature adjustment, mode selection, and fan control․ Stepping up, the Daikin Perfera remote introduces more advanced features like enhanced timer settings and potentially energy-saving modes․
The premium Daikin Stylish remote boasts a sleek design and often includes a backlit display for improved visibility․ It frequently supports more complex functions, including personalized airflow patterns and integration with smart home systems․
Even within these series, minor variations can exist based on the year of manufacture․ While the core functions remain similar, button layouts and specific feature availability may differ․ Always refer to your unit’s specific manual for accurate details regarding your remote control model․
Basic Remote Control Functions
Daikin remote controls share core functionalities for user convenience․ The Power button initiates or terminates operation, while Mode selection allows cycling through Cool, Heat, Auto, Dry, and Fan-only settings․ Temperature adjustment is typically achieved via Up and Down arrow buttons, displayed in Celsius or Fahrenheit․
These fundamental controls are consistent across most Daikin models, ensuring ease of use․ Understanding these basics is crucial before exploring advanced features․ The remote’s display provides feedback on selected settings, including temperature, mode, and fan speed․
Proper operation begins with correctly pointing the remote towards the indoor unit’s receiver․ Familiarizing yourself with these core functions will enable efficient climate control․
Powering On/Off
The Power button on your Daikin remote initiates the air conditioning system’s operation or shuts it down completely․ A single press typically activates the unit, resuming the previously selected settings if available․ Pressing the Power button again deactivates the system, returning it to a standby state․
Ensure the remote has functional batteries and is directed towards the indoor unit’s receiver for reliable operation․ Some models feature a clear visual confirmation on the remote’s display when powered on or off․
Consistent use of the Power button is the primary method for controlling the air conditioner’s availability, offering simple and direct control over energy consumption․
Mode Selection (Cool, Heat, Auto, Dry, Fan)
Daikin remotes offer versatile mode selection to cater to diverse climate control needs․ The ‘Cool’ mode lowers the room temperature, ideal for warm weather․ ‘Heat’ mode provides warmth during colder periods․ ‘Auto’ mode intelligently adjusts between cooling and heating based on the set temperature and ambient conditions․
The ‘Dry’ mode reduces humidity without significant temperature changes, enhancing comfort․ ‘Fan’ mode circulates air without temperature adjustment, useful for ventilation․ Selecting the appropriate mode is crucial for optimal performance and energy efficiency․
Refer to your specific model’s manual for detailed explanations of each mode’s functionality and recommended usage scenarios․
Temperature Adjustment
Precisely controlling room temperature is fundamental with your Daikin remote․ Utilize the ‘Up’ and ‘Down’ arrow buttons to adjust the desired temperature․ The remote displays the set temperature, allowing for accurate adjustments; Daikin units often support temperature settings within a range of 16°C to 30°C (61°F to 86°F), though this can vary by model․
Some remotes feature a ‘Temp’ button for direct temperature input․ Ensure the displayed temperature aligns with your comfort preferences․ Incorrect temperature settings can lead to inefficient operation or discomfort․ Regularly check the set temperature to maintain optimal climate control․
Refer to your model’s manual for specific temperature range details․
Advanced Features & Their Functions
Daikin remotes offer a suite of advanced features beyond basic operation․ Fan speed control allows selection from Auto, Low, Medium, High, and sometimes a ‘Quiet’ mode for reduced noise․ Swing/airflow direction control adjusts louvers for customized air distribution – vertical and horizontal adjustments are typically available․
Timer settings, including On and Off timers, enable automated operation for convenience and energy savings․ Explore ‘Powerful’ mode for rapid cooling or heating․ Some models include ‘Economy’ mode for optimized energy efficiency․ The ‘Comfort’ mode prioritizes consistent temperature․
Consult your specific model’s manual to fully understand and utilize these advanced functionalities․
Fan Speed Control
Daikin remote controls provide granular control over fan speed, optimizing comfort and energy usage․ Typically, you’ll find options including ‘Auto’, ‘Low’, ‘Medium’, and ‘High’ settings․ ‘Auto’ mode intelligently adjusts fan speed based on the difference between the set temperature and the room temperature․
Selecting ‘Low’ minimizes noise and energy consumption, ideal for quiet environments or maintaining a gentle airflow․ ‘Medium’ offers a balance between comfort and efficiency․ ‘High’ delivers maximum airflow for rapid cooling or heating․
Some Daikin models also feature a dedicated ‘Quiet’ mode, further reducing fan noise for undisturbed operation․ Experiment to find the optimal setting for your needs․
Swing/Airflow Direction Control
Daikin remote controls empower users to precisely direct airflow for personalized comfort․ The ‘Swing’ function, often represented by a swinging arrow icon, automatically oscillates the louvers, distributing air evenly throughout the room․ You can typically select vertical swing (up and down), horizontal swing (left and right), or both․
Beyond automatic swing, many models allow manual adjustment of airflow direction․ This is particularly useful for avoiding direct drafts or focusing cooling/heating on specific areas․
Some remotes feature a ‘Jet’ or ‘Airflow’ mode, concentrating airflow for rapid temperature adjustment․ Understanding these controls maximizes the efficiency and comfort of your Daikin system․
Timer Settings (On/Off Timers)
Daikin remote controls offer versatile timer functions for convenient and energy-efficient operation․ The ‘On Timer’ allows you to schedule the unit to automatically power on at a specified time, pre-cooling or pre-heating your space before you arrive․ Conversely, the ‘Off Timer’ sets a time for the unit to automatically shut down․
Programming timers typically involves setting the desired time and selecting the operating mode (Cool, Heat, Auto, etc․)․ Some models support multiple timer settings, enabling complex schedules․
Utilizing these timer features can significantly reduce energy consumption and ensure optimal comfort without manual intervention․ Refer to your specific model’s manual for detailed timer programming instructions․
Troubleshooting Common Remote Control Issues
Encountering issues with your Daikin remote is common, but often easily resolved․ If the remote isn’t responding, first check the batteries, ensuring they are correctly installed and have sufficient charge․ Obstructions between the remote and the indoor unit can also interfere with the signal; remove any obstacles․
An incorrect temperature display usually indicates a sensor issue within the unit itself, requiring professional attention․ If the timer isn’t functioning, double-check the programmed settings and ensure the current time is accurately set on the remote․
For persistent problems, consult the error code section or contact Daikin support․
Remote Not Responding
A non-responsive Daikin remote can stem from several easily addressable causes․ Begin by verifying the batteries; replace them with fresh ones, ensuring correct polarity․ Confirm there’s a clear line of sight between the remote and the indoor unit’s receiver – obstructions like furniture or decorations can block the infrared signal․
Try cleaning the remote’s infrared emitter with a soft, dry cloth to remove any dust or grime․ If the issue persists, attempt resetting the remote (refer to the ‘Resetting the Remote Control’ section)․ A faulty remote might require replacement, but always rule out simpler solutions first․
Incorrect Temperature Display
An inaccurate temperature reading on your Daikin remote can be frustrating, but often has a straightforward fix․ First, ensure the remote isn’t exposed to direct sunlight or heat sources, as this can interfere with the sensor․ Verify the remote is set to the correct temperature scale – Celsius or Fahrenheit – within the settings menu․
If the displayed temperature significantly differs from the actual room temperature, try resetting the remote․ In some cases, a malfunctioning temperature sensor within the remote itself may be the culprit, necessitating a replacement․ Confirm the indoor unit’s temperature sensor isn’t obstructed․
Timer Not Working
If your Daikin air conditioner’s timer function isn’t operating as expected, several factors could be at play․ Initially, double-check that the current time on the remote is accurately set; an incorrect time will naturally disrupt timer schedules․ Ensure the timer mode – On or Off – is selected correctly, and that the set times haven’t inadvertently been overwritten․
Power outages can sometimes reset the timer settings, requiring you to reprogram them․ If the issue persists, verify the remote’s batteries have sufficient charge․ A weak signal can cause communication errors․ Finally, confirm the unit isn’t receiving conflicting signals from other devices․
Specific Daikin Model Remote Control Guides
Daikin offers a variety of remote control designs tailored to different air conditioning models, each with unique features and layouts․ The Daikin Siesta remote, often found with entry-level units, prioritizes simplicity and essential functions․ Conversely, the Daikin Perfera remote introduces more advanced settings, including energy-saving modes and detailed fan control․
For premium systems, the Daikin Stylish remote boasts a sleek design and intuitive interface, often incorporating smartphone connectivity․ Understanding the specific remote associated with your Daikin unit is crucial for maximizing its capabilities․ Refer to the dedicated sections below for detailed guidance on each model’s operation․
Daikin Siesta Remote Control
The Daikin Siesta remote control, typically paired with more affordable Daikin units, focuses on providing essential climate control in a user-friendly manner․ Its layout is straightforward, featuring clearly labeled buttons for power, mode selection (Cool, Heat, Auto, Dry, Fan), and temperature adjustment․
While lacking some of the advanced features found in higher-end remotes, the Siesta model effectively manages basic functions․ Users can easily adjust fan speed and utilize the on/off timer․ Common issues include unresponsive buttons or incorrect temperature displays, often resolved with battery replacement․ This remote prioritizes simplicity and reliability for everyday use․
Daikin Perfera Remote Control
The Daikin Perfera remote control offers a step up in functionality compared to the Siesta model, catering to the mid-range Perfera air conditioning units․ It maintains the intuitive layout for core functions like power, mode selection, and temperature control, but introduces enhanced features for optimized comfort․
Users benefit from more granular fan speed adjustments and precise airflow direction control․ The Perfera remote also provides advanced timer settings, allowing for customized on/off schedules․ Reports suggest potential issues with temperature synchronization across multiple Perfera units in a trial split system․ Regular maintenance, including battery checks, ensures optimal performance and responsiveness․
Daikin Stylish Remote Control
The Daikin Stylish remote control, designed for the premium Stylish series, boasts a sleek design and advanced features for ultimate climate control․ Beyond the standard power, mode, and temperature adjustments, it offers sophisticated options like personalized airflow patterns and intelligent energy-saving modes․
Users can expect precise control over fan speeds and swing functions․ Installation alongside trial split systems sometimes reveals temperature discrepancies between units, requiring careful calibration; Like other Daikin remotes, regular battery replacement is crucial for reliable operation․ Troubleshooting may involve checking for error codes or consulting the online manual for specific Stylish model guidance․
Error Codes Displayed on the Remote
Daikin air conditioning units utilize error codes displayed on the remote to diagnose system malfunctions, enabling quicker troubleshooting and repair․ These codes provide valuable insights into the nature of the problem, ranging from sensor failures to refrigerant issues․
A commonly reported error is the “U4” code, often indicating a communication problem between the indoor and outdoor units․ Other codes may signal issues with the fan motor, temperature sensors, or compressor․ Consulting the specific model’s manual is crucial for accurate interpretation․ Ignoring error codes can lead to further damage, so prompt attention and potentially professional assistance are recommended for effective resolution․
Understanding U4 Error Code
The Daikin U4 error code frequently signals a communication breakdown between the indoor and outdoor units of your air conditioning system․ This disruption prevents proper operation and requires investigation to restore functionality․ Several factors can trigger this error, including loose wiring, a faulty control board, or issues with the communication cable connecting the units․
Initial troubleshooting steps involve checking the wiring connections at both the indoor and outdoor units, ensuring they are secure․ If the connections appear sound, the problem might lie within the control board or the communication cable itself․ In such cases, professional diagnosis and repair are highly recommended to avoid further complications and ensure the system operates efficiently․
Replacing Batteries & Remote Maintenance
Maintaining your Daikin remote control is crucial for consistent operation․ Begin by regularly checking the batteries; when the display dims or becomes unresponsive, it’s time for replacements․ Use only the recommended battery type – typically AAA or AA – to avoid potential damage․ When replacing, ensure correct polarity alignment (+ and -)․
Beyond batteries, keep the remote clean․ Gently wipe the surface with a soft, dry cloth to remove dust and fingerprints․ Avoid using liquids or abrasive cleaners, as these can harm the buttons and display․ Store the remote in a safe, dry place when not in use, protecting it from extreme temperatures and direct sunlight to prolong its lifespan․
Resetting the Remote Control
Occasionally, your Daikin remote control may experience glitches requiring a reset․ While a dedicated reset button isn’t always present, a simple battery removal can often resolve minor issues․ Turn off the air conditioning unit, then remove the batteries from the remote․ Press and hold any button on the remote for approximately 30 seconds while the batteries are removed – this discharges any residual power․

Reinsert the batteries, ensuring correct polarity․ Then, power on the air conditioning unit and attempt to re-pair the remote if necessary․ If problems persist after this process, consult the specific model’s manual for detailed instructions, as reset procedures can vary slightly between Daikin remote types․
Connecting to the Daikin Mobile App (If Applicable)
Many modern Daikin air conditioning units offer connectivity via a dedicated mobile app, providing remote control and monitoring capabilities․ To connect, download the Daikin app (often “Daikin Mobile Control”) from your app store․ Ensure your air conditioning unit is compatible – typically, models with Wi-Fi functionality support app connectivity․
Follow the in-app instructions, which usually involve connecting your smartphone to the air conditioner’s Wi-Fi network․ You may need to enter your home Wi-Fi password; Once connected, you can control temperature, mode, fan speed, and timers remotely․ The app also provides access to energy monitoring features and error code diagnostics, enhancing user convenience and control․
Remote Control Compatibility
Daikin air conditioning systems utilize a variety of remote control models, and ensuring compatibility is crucial for optimal functionality․ While many remotes are model-specific, some universal remotes can be programmed to operate Daikin units․ However, full feature access is generally guaranteed only with the original Daikin remote designed for your specific air conditioner model․
Compatibility information is typically found in your air conditioner’s manual or on the Daikin website․ When replacing a lost or damaged remote, always verify the model number to ensure a proper fit and function․ Using an incompatible remote may result in limited control or complete non-responsiveness, hindering your ability to manage your Daikin system effectively․
Finding Your Remote Control Manual Online
Locating your Daikin air conditioning remote control manual online is often the quickest and most convenient solution when the physical copy is misplaced․ The official Daikin website provides a comprehensive library of manuals, searchable by model number․ Begin by identifying your air conditioner’s model, usually found on a sticker located on the unit itself or on the original packaging․
Alternatively, numerous third-party websites archive appliance manuals․ A simple web search using terms like “Daikin remote control manual” along with your model number will yield relevant results․ These online resources often offer downloadable PDF versions for easy access and offline viewing, ensuring you always have the information you need at your fingertips․
Daikin Onecta Warmtepomp Remote Issues
Daikin Onecta warmtepomp (heat pump) remote controls can present unique challenges, often involving connectivity or operational glitches․ Users have reported recurring problems with the indoor unit, despite multiple technician visits failing to pinpoint the root cause․ Common complaints include the remote seemingly losing connection or exhibiting erratic behavior, impacting temperature control and overall system performance․
Troubleshooting steps include checking battery levels, ensuring a clear line of sight between the remote and the indoor unit, and attempting a remote reset․ If issues persist, contacting a qualified Daikin installer or support is crucial, as these systems often require specialized diagnostics and software updates to resolve complex remote-related problems․
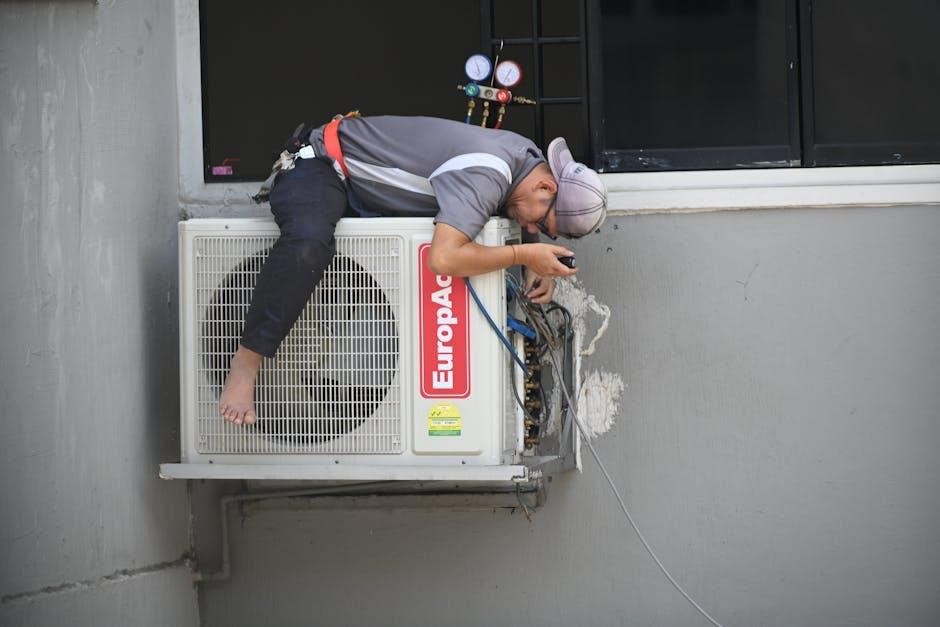
Testing and Refilling Air Conditioning Systems
Proper testing and refrigerant refilling are vital for Daikin air conditioning system performance, though not directly related to the remote control itself․ Once installation—including piping and cabling—is complete, a thorough system test is essential․ This confirms correct operation of the air conditioner or air-to-air heat pump, verifying cooling and heating functionalities․
Refilling refrigerant should only be performed by certified technicians․ Low refrigerant levels significantly reduce efficiency and can damage the compressor․ The testing process involves checking pressures, temperatures, and airflow to identify leaks or inefficiencies․ Regular maintenance, including refrigerant checks, ensures optimal performance and extends the lifespan of your Daikin system․
Old Daikin Air Conditioner Malfunctions
Older Daikin air conditioners can experience various malfunctions, sometimes mimicking remote control issues, but often stemming from internal component failures․ Sudden operational stops, as reported with one unit, can indicate a system error requiring professional diagnosis․ A common problem involves the appearance of error codes, such as the U4 code, signaling communication failures or sensor malfunctions․
Decreased cooling efficiency or inconsistent temperature regulation can also occur․ These issues might not be resolvable through remote control adjustments alone․ Regular maintenance is crucial for older units, including cleaning filters and checking refrigerant levels․ If problems persist, consulting a qualified technician is recommended to avoid further damage and ensure safe operation;
Installation and Connection of Air Conditioning Units
Proper installation is paramount for optimal Daikin air conditioner performance and remote control functionality․ Initial setup involves correctly positioning indoor and outdoor units, ensuring proper refrigerant line connections, and secure electrical wiring․ Following installation, a thorough system test, including refrigerant charge verification, is essential, as highlighted in discussions about air conditioning system testing․
Incorrect installation can lead to communication errors between the indoor and outdoor units, potentially manifesting as remote control responsiveness issues․ Trial split systems require careful alignment of indoor units for consistent temperature control․ Professional installation guarantees correct wiring and system configuration, maximizing efficiency and preventing future malfunctions․