
L-Shaped Desk Assembly Instructions PDF: A Comprehensive Plan

Navigating L-shaped desk assembly requires a detailed PDF manual‚ often including 7 pages and 1.55MB in size.
These guides detail parts lists (P1-P16)‚
screw types (M6 x 55mm‚ M6 x 21mm)‚ and step-by-step instructions
for frame construction‚ leg attachment‚ and desktop securing.
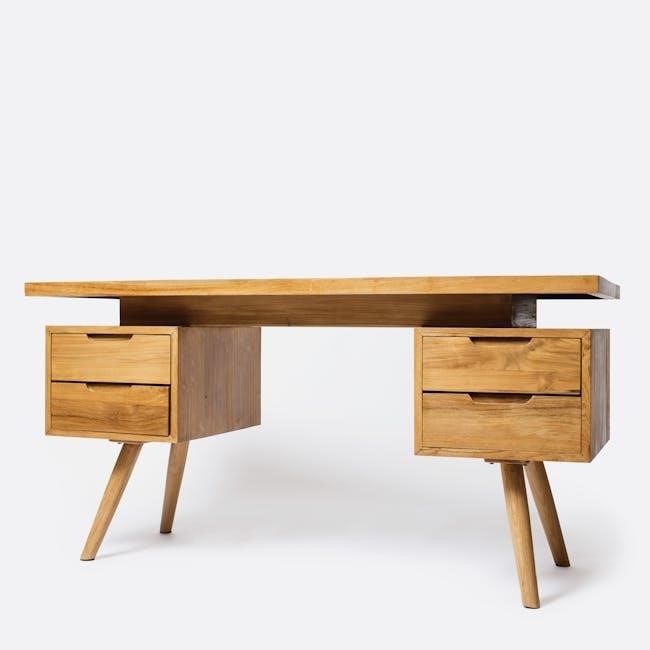
Embarking on the assembly of an L-shaped desk can seem daunting‚ but with a comprehensive PDF manual‚ the process becomes manageable. These desks‚ popular for home and gaming offices‚ offer expanded workspace and ergonomic benefits. The initial step involves familiarizing yourself with the provided documentation – typically a multi-page PDF‚ around 7 pages and 1.55MB in size‚ detailing each stage.
Understanding the scope of the assembly is crucial. Manuals from brands like BESTIER‚ CKP (BattleStation)‚ and UPLIFT Desk provide specific guidance tailored to their models. The process generally includes frame construction‚ leg attachment‚ installing lower bars and crossbar rails‚ and finally‚ securing the desktop.

Whether your desk features a standard wood desktop or incorporates glass components (like the 50-JN15L05 model)‚ the PDF will outline the correct hardware – hex keys‚ M6 screws of varying lengths – and the proper sequence for a stable and functional workspace. Prior to starting‚ a quick review of safety warnings is highly recommended.
Understanding the Parts List
A thorough understanding of the parts list is paramount before commencing L-shaped desk assembly. The provided PDF manual will typically feature a detailed diagram identifying each component‚ often labeled with codes like P1 through P16‚ as seen in examples from various manufacturers.
These lists categorize components into several groups: frame pieces (Upper Bars‚ Lower Bar)‚ legs‚ desktop sections (including glass components for some models)‚ shelves (if applicable)‚ and crossbar rails. Crucially‚ the manual also details the hardware – screws (M6 x 55mm‚ M6 x 21mm are common)‚ bolts‚ and potentially specialized connectors.
Carefully inventory all parts against the list before beginning. Discrepancies should be addressed with customer support (UPLIFT Desk provides contact info: 1-800-349-3839). Pay close attention to quantities; multiple identical parts are often included. Recognizing each part’s function and corresponding label will streamline the assembly process and prevent errors.
Tools Required for Assembly
Generally‚ assembling an L-shaped desk is straightforward‚ but having the correct tools ensures efficiency and prevents damage. The core tool‚ consistently mentioned in assembly guides‚ is a hex key – often included with the desk itself. However‚ depending on the model’s complexity‚ additional tools may be necessary.
While not always mandatory‚ a Phillips head screwdriver is highly recommended for securing various screws (M6 x 55mm‚ M6 x 21mm). For desks with glass components‚ gentle handling and potentially rubber gloves are advisable. Power drills with appropriate bits can expedite the process‚ but use caution to avoid over-tightening and stripping screws.
A soft cloth or protective surface is crucial to prevent scratching the desktop during assembly. Measuring tape can be helpful for precise alignment. Review the specific PDF manual for your desk model; it will explicitly list any required tools beyond the standard hex key. Preparation is key to a smooth assembly experience.
Step-by-Step Assembly: Frame Construction
Initiating frame construction typically involves connecting the upper bars – often designated as parts P2 and P1 – using provided screws. Ensure correct orientation; some legs (like those with extra holes) are specifically designed for the rear. The Lower Bar (P9) then attaches to these legs using M6 x 55mm screws (B)‚ forming the foundational support structure.
For desks featuring crossbar rails‚ insert them into the designated slots on the frame ends‚ ensuring the slot faces inward towards the underside. This step provides added stability. Refer to diagrams in the PDF manual (CKP5454GLD BattleStation as an example) for precise component placement and screw locations (steps 5-8).
Carefully align all components before fully tightening screws. A wobbly frame indicates misalignment. Double-check connections against the parts list (P1-P16) to confirm all necessary pieces are incorporated. A solid‚ correctly assembled frame is crucial for supporting the desktop and subsequent components.
Attaching the Legs to the Frame
Securely attaching the legs is paramount for desk stability. Begin by aligning the legs‚ paying close attention to any specific orientation requirements – notably‚ rear legs often feature an extra hole for identification. Utilize M6 x 55mm screws (B) to fasten the legs to the Lower Bar (P9)‚ ensuring a snug fit but avoiding over-tightening initially.
The 7 Modern L-Shaped Glass and Wood Desk (50-JN15L05) instructions emphasize precise alignment. Once all legs are tentatively attached‚ re-check the overall frame squareness before fully tightening all screws. This prevents warping or instability.
Refer to the assembly manual’s diagrams (like those in the BESTIER L-Shaped Desk instructions) for visual guidance on screw placement and leg orientation. Confirm that each leg is firmly connected to both the Lower Bar and the upper frame sections. A stable leg attachment is the foundation for a durable and safe desk setup.
Installing the Lower Bar
The Lower Bar (P9) serves as a crucial structural component‚ connecting the legs and providing support for the desktop. Typically‚ the Lower Bar attaches to the legs using M6 x 55mm screws (B)‚ as detailed in the 7 Modern L-Shaped Glass and Wood Desk instructions (50-JN15L05). Ensure proper alignment before fully tightening.
Assembly manuals‚ like those for the BESTIER L-Shaped Desk‚ often illustrate the Lower Bar’s positioning relative to the legs. Pay attention to any specific instructions regarding the bar’s orientation – some models may have designated front and rear sides.
Prior to complete fastening‚ verify the frame’s squareness. An improperly installed Lower Bar can lead to instability. Double-check that all connection points are secure and that the bar is level. This foundational step is critical for a stable and functional L-shaped desk. Refer to the PDF for detailed diagrams.

Connecting the Desktop to the Frame
Carefully position the assembled frame onto the underside of the desktop. The instructions emphasize placing the desktop on the ground to facilitate this process‚ as highlighted in the BATTLESTATION L-Shape Gaming Desk manual (CKP5454GLD). Ensure the frame is centered and aligned with the desktop’s edges before proceeding.

For glass desktop components‚ like those in the 7 Modern L-Shaped Desk (50-JN15L05)‚ precise alignment is paramount. The manual details attaching the glass pieces to the Upper Bars using M6 x 21mm screws (E).
Before securing with screws‚ double-check the frame’s orientation relative to the desktop’s intended front and back. This prevents reversed assembly. The PDF manual will provide diagrams illustrating the correct positioning. Take your time and ensure a flush fit to avoid uneven weight distribution and potential instability.
Securing the Desktop with Screws
Once the frame is correctly positioned on the desktop‚ secure it using the appropriate screws. The 7 Modern L-Shaped Desk manual (50-JN15L05) specifies M6 x 55mm screws (B) for attaching legs to the Lower Bar‚ while M6 x 21mm screws (E) are used for glass desktop components. Refer to your specific model’s PDF for the correct screw sizes and quantities.
Tighten the screws gradually and evenly‚ working in a diagonal pattern. This ensures uniform pressure distribution and prevents warping or cracking of the desktop. Avoid over-tightening‚ as this can strip the screw holes or damage the desktop material.
The BESTIER L-Shaped Desk manual (v101) emphasizes checking the “Installation Points” before screw application. Double-check alignment as you tighten each screw‚ ensuring the frame remains flush against the desktop surface. A secure attachment is crucial for desk stability and safety.
Assembling Shelves (If Applicable)
Many L-shaped desks‚ like the BESTIER model‚ include optional shelving units. Assembly typically involves connecting shelf panels to supporting frames using screws or cam locks – consult your PDF manual for specifics. The parts list (BESTIER v101) will identify shelf components (often labeled with numbers like P8‚ P9‚ etc.) and corresponding hardware.

Begin by assembling the shelf frame‚ ensuring correct orientation of side panels and supports. Then‚ carefully slide or attach the shelf panels into the frame‚ securing them with the provided fasteners. Tighten screws gradually to avoid damaging the shelf material.
Once assembled‚ the shelves can be attached to the desk frame‚ often using screws or brackets. Ensure the shelves are level and securely fastened before placing any items on them. Refer to diagrams in the PDF manual for proper placement and attachment points.
Installing Crossbar Rails
Crossbar rails are crucial for L-shaped desk stability‚ particularly standing desk models from UPLIFT Desk. The PDF manual will illustrate how to insert these rails into the slots on the frame ends. Ensure they face inward‚ with the slot positioned closer to the underside of the frame – incorrect orientation hinders proper function.
Typically‚ regular crossbar rails are used‚ supplementing the main frame structure. The installation process involves sliding the rails into the designated slots‚ often requiring a firm but gentle push. Some models may utilize locking mechanisms or screws to further secure the rails.
Double-check that the rails are fully inserted and locked in place before proceeding. Proper installation prevents wobbling and ensures the desk can safely support weight‚ especially in a standing configuration. Refer to the manual’s diagrams for precise positioning and any model-specific instructions.
Dealing with Glass Desktop Components
L-shaped desks featuring glass desktops‚ like the Modern L-Shaped Glass and Wood Desk (Model 50-JN15L05)‚ require careful handling during assembly. The PDF manual will detail the specific process for attaching the glass pieces to the upper bars.
Typically‚ this involves aligning the desktop glass pieces (identified as part 13 in some manuals) and securing them using M6 x 21mm screws (part E). Eight screws are generally required for each glass piece‚ ensuring a firm and even connection.
Caution is paramount when working with glass. Avoid over-tightening the screws‚ as this could cause cracking or breakage. Ensure the glass is properly supported during installation to prevent stress. The manual will likely emphasize gentle tightening in a criss-cross pattern to distribute pressure evenly. Inspect for any chips or damage before beginning.
Specific Instructions for Gaming Desks
Gaming desks‚ such as the CKP5454GLD BATTLESTATION L-Shape Gaming Desk‚ often have unique assembly steps detailed in their PDF manuals. These instructions frequently emphasize the correct orientation of components during frame construction‚ referencing parts labeled (G)‚ (E)‚ (J)‚ (H)‚ and (I).
Pay close attention to step-by-step diagrams‚ particularly when attaching components like the lower bar and legs. The manual will illustrate how parts (1)‚ (2)‚ and (3) connect‚ and may highlight specific screw placements (steps 6‚ 7‚ 8). Safety warnings are crucial‚ advising users to read instructions before starting.
Crossbar rail installation is another key area. Ensure regular rails are inserted into the correct slots‚ facing inward with the slot closer to the frame’s underside. The PDF will likely show the proper positioning of parts (B) and (21) for optimal stability and ergonomic support during intense gaming sessions.

Troubleshooting Common Assembly Issues
Assembly PDFs often don’t explicitly cover troubleshooting‚ but common issues arise. If screws don’t align‚ double-check the frame orientation – ensure back legs with extra holes are positioned correctly‚ as highlighted in some manuals (Model 50-JN15L05). Misaligned parts (P1-P16) can stem from incorrect step sequencing; revisit the PDF’s step-by-step guide.
Difficulty attaching the desktop often relates to improper frame positioning. The PDF may instruct to place the desktop on the ground and position the frame on top. If crossbar rails (regular type) won’t insert‚ verify they’re facing inward with the correct slot orientation.
Missing parts are a frequent concern. Refer to the parts list (Bestier L-Shaped Desk) and contact customer support (Uplift Desk: 1-800-349-3839‚ infoupliftdesk.com) if anything is absent. Always retain the PDF for reference during support interactions.
Safety Warnings and Precautions
L-shaped desk assembly‚ as outlined in accompanying PDFs (like CKP5454GLD BattleStation)‚ necessitates prioritizing safety. Assembly instructions frequently begin with explicit warnings – please read first – emphasizing careful handling of components to prevent injury.
Always ensure a clear‚ spacious work area‚ free from obstructions. When lifting desktop components‚ particularly glass (Model 50-JN15L05)‚ employ proper lifting techniques to avoid strain or breakage. Securely tighten all screws (M6 x 55mm‚ M6 x 21mm) to prevent instability‚ but avoid over-tightening‚ which could damage the materials.
Be mindful of pinch points during frame construction and leg attachment. If the desk includes a standing function (Electric L-Shape Standing Desk)‚ exercise caution during height adjustments. Retain the PDF manual for future reference regarding safety guidelines and maintenance.
Finding the Correct PDF Manual Online
Locating the correct PDF manual for your L-shaped desk is crucial for successful assembly. Start by checking the manufacturer’s official website – Uplift Desk (upliftdesk.com) is one example‚ offering downloadable PDFs. Search using the desk’s model number (e.g.‚ CKP5454GLD‚ 50-JN15L05) for precise results.
If the manufacturer’s site proves unhelpful‚ broaden your search using a search engine. Include keywords like “L-shaped desk assembly instructions PDF” along with the brand and model. Retailer websites (like nanupgradedecorshop.com) sometimes host manuals as well.
Verify the PDF’s authenticity by comparing the model number on the document to that on your desk. Ensure the manual corresponds to your specific desk configuration (e.g.‚ with or without shelves). A typical manual will be around 7 pages and 1.55MB in size‚ offering detailed diagrams and parts lists (P1-P16).
Contacting Customer Support for Assistance
When facing persistent assembly challenges‚ don’t hesitate to contact the manufacturer’s customer support. Uplift Desk‚ for instance‚ provides assistance at 1-800-349-3839 or via email at infoupliftdesk.com. Be prepared to provide your desk’s model number and a clear description of the issue.

Before contacting support‚ review the PDF manual again‚ focusing on the relevant assembly steps. Having the manual open will allow you to reference specific parts (P1-P16) and screw types (M6 x 55mm‚ M6 x 21mm) during the conversation.
Many manufacturers offer online chat support or FAQs addressing common assembly problems. Retailers may also provide assistance‚ particularly if the desk was recently purchased. Document any communication with support‚ including dates‚ times‚ and the representative’s name‚ for future reference. A clear explanation of the problem‚ coupled with your model number‚ will expedite the resolution process;