
GE induction stoves offer innovative cooking with precise temperature control and rapid heating, blending modern technology with reliable performance for culinary enthusiasts․
What is an Induction Stove?
Unlike traditional electric stoves that heat the cooktop surface, an induction stove utilizes electromagnetic energy directly to heat the cookware itself․ This innovative technology creates a magnetic field between the stove’s glass surface and the ferromagnetic cookware, generating heat within the pot or pan․
GE induction stoves are known for their speed, efficiency, and precise temperature control․ Because the cooktop remains relatively cool to the touch, it offers enhanced safety compared to conventional methods․ This direct heating process minimizes energy loss, making induction cooking a more environmentally friendly option․ Understanding this core principle is key to maximizing your GE induction stove’s potential․
Benefits of Using a GE Induction Stove
GE induction stoves deliver numerous advantages for the modern kitchen․ Their rapid heating capabilities significantly reduce cooking times, offering convenience for busy lifestyles․ Precise temperature control ensures consistent results, from delicate simmering to high-heat searing․
Furthermore, the smooth glass surface is easy to clean, eliminating the need for harsh scrubbing․ Enhanced safety features, like automatic shut-off and cool-to-the-touch surfaces, provide peace of mind․ Induction cooking is also energy-efficient, minimizing wasted heat and lowering energy bills․ Utilizing smart features with Google Nest integration adds convenience, allowing remote control and voice activation․

Understanding Your GE Induction Stove Model
Familiarizing yourself with your specific GE induction stove model is crucial for optimal performance and safe operation, ensuring a seamless cooking experience․
Identifying Your Model Number
Locating your GE induction stove’s model number is the first step towards accessing specific support and documentation․ This unique identifier allows you to download the correct manual, find replacement parts, and receive tailored assistance from GE’s customer service․ The model number is typically found on a sticker or plate affixed to the appliance․
Common locations include the frame of the cooktop when you open the lift-up glass surface, on the back of the unit, or along the side edges․ It’s a combination of letters and numbers, often starting with a “J” or “P”․ Record this number carefully, as it will be required when contacting GE for service or warranty claims․ Having the serial number handy is also beneficial, as it provides further details about your stove’s manufacturing date and specifications․
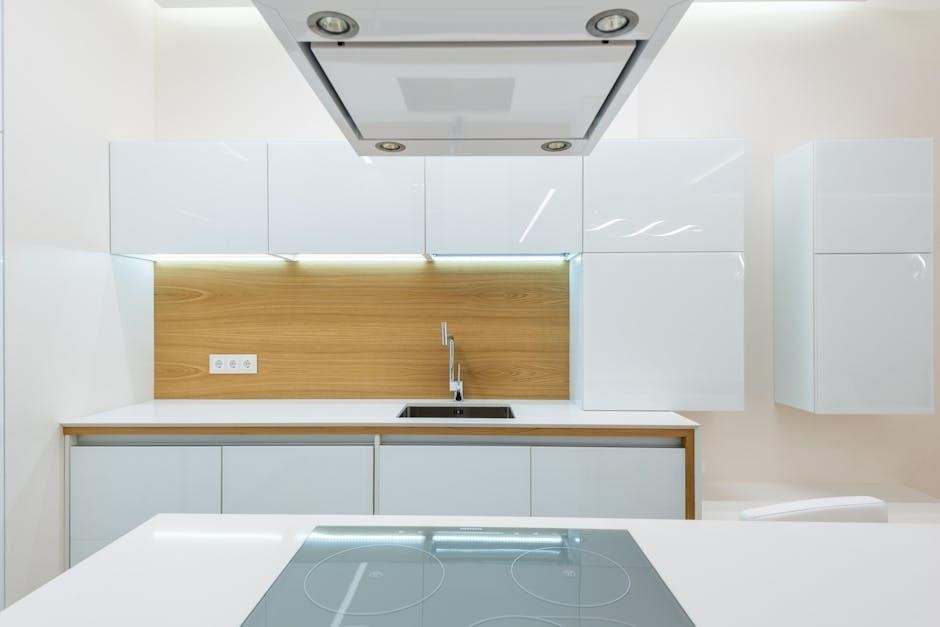
Key Features and Components
GE induction stoves boast several key features enhancing the cooking experience․ These include precise temperature control, rapid heating capabilities, and a sleek, easy-to-clean glass cooktop surface․ Components commonly found are induction elements of varying sizes, a digital control panel for adjusting settings, and safety features like a pan detection system․
Many models incorporate bridge elements, allowing you to combine two elements for larger cookware․ Power boost functionality provides intense heat for quick boiling or searing․ Sensor cook options automatically adjust cooking times and temperatures for optimal results․ Familiarize yourself with these components and their functions to maximize your stove’s potential and ensure safe, efficient operation․
Control Panel Overview
The GE induction stove’s control panel is designed for intuitive operation․ Typically, you’ll find power buttons, heat level controls (often numbered or with plus/minus symbols), and timer settings․ Dedicated buttons may activate features like the power boost or bridge element․ Digital displays clearly show selected settings and remaining cook times․
Touchscreen models offer streamlined control, while traditional button layouts provide tactile feedback․ Explore the panel to locate functions for locking controls, selecting sensor cook options, and adjusting clock settings․ Understanding the layout and symbols will allow you to confidently navigate the stove’s features and customize your cooking experience efficiently․

Safety Precautions
Always prioritize safety when using your GE induction stove; ensure proper cookware, avoid metallic objects, and supervise cooking to prevent hazards․
General Safety Guidelines
Prioritize safety during operation․ Read all instructions before initial use to understand potential hazards․ Keep children and pets away from the cooktop during and immediately after cooking, as surfaces remain hot․ Never place metallic objects, such as utensils or containers, on the cooktop while it’s in use, as they can heat up rapidly and cause burns․
Avoid using extension cords, connecting directly to a grounded outlet․ Do not attempt to repair the stove yourself; contact qualified service personnel for any maintenance or repairs․ Ensure proper ventilation when cooking, and never leave the stove unattended while in operation․ Regularly inspect the cooktop for any damage, and discontinue use if cracks or other issues are present․ Always turn off the stove and allow it to cool completely before cleaning․
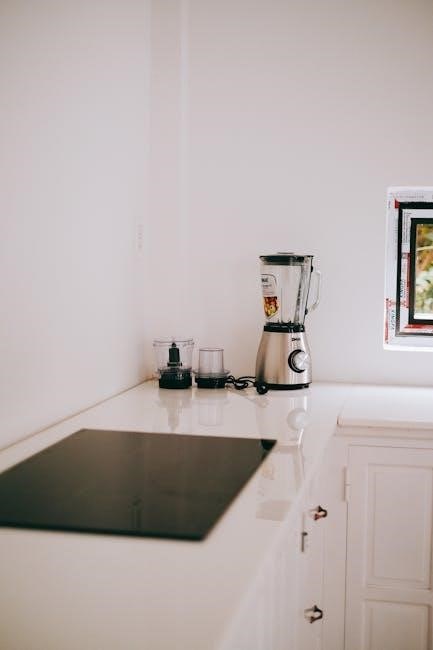
Proper Cookware Requirements
Induction cooking demands specific cookware for optimal performance․ Only use cookware with a magnetic base – stainless steel, cast iron, or enameled steel are generally suitable․ To test, a magnet should firmly attach to the bottom of the pan․ Aluminum, copper, and glass cookware will not work unless they have a magnetic base layer․
Ensure the cookware base is flat and makes full contact with the cooktop surface for efficient heat transfer․ Avoid using cookware with rounded bases or warping․ The size of the cookware should correspond to the size of the heating element for best results․ Regularly check cookware for any damage or deformation that might affect its performance on the induction stove․
What to Avoid on an Induction Cooktop

Never place plastic containers or utensils on a hot induction cooktop, as they will melt․ Avoid using cookware with rough bottoms, as they can scratch the glass surface․ Do not drag cookware across the cooktop; lift it to prevent damage․ Metal objects like knives or forks should not be left on the surface while cooking․
Also, refrain from placing empty cookware on a heated element, as this can cause damage․ Avoid using aluminum foil or plastic wrap directly on the cooktop․ Do not attempt to repair the cooktop yourself; contact a qualified technician for any issues․ Keep the cooktop clean to ensure proper functioning and prevent overheating․

Operating Instructions
To begin, ensure the cooktop is clean and dry; then, select your desired heat level using the intuitive control panel for optimal cooking results․
Powering On and Off
To power on your GE induction stove, simply touch the power button, typically indicated by a circle with a vertical line, on the control panel․ A confirmation light will illuminate, signaling the stove is ready for use․ Ensure the control panel is unlocked before attempting to adjust settings․
For safety, the stove features an automatic shut-off function․ If no activity is detected for a set period, it will power down․ To turn off the stove completely, press and hold the power button for a few seconds until the display turns off․ Some models may have a separate “Lock” function to prevent accidental activation, especially important for households with children․ Always confirm the surface is cool before leaving unattended․
Adjusting Heat Settings
GE induction stoves offer precise heat control, typically using a numbered scale from 1 to 10, with 1 being the lowest and 10 the highest setting․ Adjust heat levels by touching the corresponding number on the control panel․ Some models feature a slider or plus/minus buttons for incremental adjustments․
For delicate simmering, use lower settings (1-3)․ Medium settings (4-7) are ideal for everyday cooking like sautéing and frying․ Higher settings (8-10) are best for boiling and searing․ Remember, induction heats the cookware directly, so adjustments are rapid․ Monitor your food closely and adjust as needed to prevent burning․ Many GE models also include a “Power Boost” feature for exceptionally fast heating․
Using Timer Functions
GE induction stoves commonly feature multiple timer options: a kitchen timer and a delayed start timer․ To set the kitchen timer, press the “Timer” button, then use the number pad to enter the desired cooking time․ Press “Start” to begin the countdown․ An audible alert will sound when the timer reaches zero;
The delayed start timer allows you to program the stove to begin cooking at a specific time․ Select the desired cooking time and future start time․ The stove will automatically turn on at the programmed time․ Ensure cookware is in place before setting a delayed start․ Refer to your model’s manual for specific timer function details, as features may vary․

Cleaning and Maintenance
Regular cleaning preserves your GE induction stove’s performance and appearance; wipe spills immediately with a soft cloth and mild detergent for optimal results․
Daily Cleaning Procedures
To maintain your GE induction cooktop’s pristine condition, implement these simple daily cleaning procedures․ After each use, allow the cooktop to cool completely before beginning․ Gently wipe the surface with a soft, damp cloth to remove any loose food particles or spills․ For stubborn residue, apply a small amount of dish soap to the cloth, ensuring it’s non-abrasive to avoid scratching the glass surface․
Avoid using harsh chemicals, scouring pads, or abrasive cleaners, as these can damage the cooktop․ Rinse the cloth thoroughly and wipe the surface again to remove any soap residue․ Finally, dry the cooktop with a clean, dry cloth to prevent water spots․ Consistent daily cleaning will prevent buildup and ensure your induction stove remains in excellent working order for years to come․
Deep Cleaning Methods
For a more thorough clean, periodically employ these deep cleaning methods on your GE induction cooktop․ Begin by ensuring the cooktop is cool and disconnected from power․ Apply a specialized ceramic cooktop cleaner – readily available at most appliance retailers – following the product’s instructions carefully․ Use a cooktop scraper, held at a 45-degree angle, to gently remove any baked-on food residue․
Avoid excessive pressure to prevent scratches․ After scraping, polish the surface with a clean microfiber cloth․ For lingering stains, create a paste of baking soda and water, apply it to the stain, let it sit for a few minutes, then gently scrub and rinse․ Always dry the cooktop thoroughly after deep cleaning to maintain its shine and prevent watermarks․
Troubleshooting Common Issues
If your GE induction stove isn’t responding, first verify the power cord is securely plugged in and the circuit breaker hasn’t tripped․ If the display illuminates but the cooktop doesn’t heat, ensure you’re using compatible cookware – induction-ready pots and pans are essential․ A common issue is cookware being off-center on the element; reposition it for optimal heating․
Error codes displayed on the control panel indicate specific problems; consult your owner’s manual for a detailed explanation of each code and suggested solutions․ If the cooktop shuts off unexpectedly, it might be due to overheating; allow it to cool before attempting to restart․ For persistent issues, contacting GE customer support is recommended․
Advanced Features
GE induction stoves boast bridge elements, power boost functionality, and sensor cook options, enhancing cooking versatility and precision for optimal culinary results․
Bridge Element Functionality
GE induction cooktops often feature a bridge element, a remarkably useful function that allows you to connect two adjacent heating elements into a single, larger cooking surface․ This is particularly beneficial when using oversized or unusually shaped cookware, such as griddles, large skillets, or oblong roasting pans․
Activating the bridge element effectively combines the power of both individual elements, providing consistent heat distribution across the entire connected area․ The control panel will typically have a dedicated button or touch control to engage this feature․ It’s important to ensure your cookware spans both activated elements for optimal performance․ This feature expands cooking possibilities and simplifies preparing meals for larger gatherings, offering flexibility beyond standard burner sizes․
Power Boost Feature
GE induction cooktops frequently include a Power Boost feature, designed to deliver maximum heating power to a selected burner for rapid boiling, searing, or stir-frying․ This function temporarily overrides the power limits of that specific element, providing a significant increase in wattage․
To activate Power Boost, typically a dedicated button with a flame or power symbol is pressed while the burner is selected․ The display will usually indicate when the feature is engaged․ It’s ideal for quickly bringing liquids to a boil or achieving high-heat cooking results․ However, be mindful that using Power Boost may temporarily affect the power available to other burners on the cooktop․ Once the desired temperature is reached, the feature automatically reverts to the standard power setting․
Sensor Cook Options
GE induction stoves often boast Sensor Cook options, automating cooking processes for optimal results․ These features utilize built-in sensors to monitor the internal temperature of food, adjusting cooking power and time accordingly․ Common sensor cook settings include options for reheating, baking, simmering, and specific food types like potatoes or rice․
To utilize Sensor Cook, select the appropriate setting on the control panel, and the stove will automatically determine the ideal cooking parameters․ It’s crucial to ensure the food is properly prepared and placed in a suitable container for accurate temperature readings․ This technology minimizes guesswork, preventing overcooking or undercooking, and delivering consistently delicious meals with minimal effort․ Refer to your model’s manual for a complete list of available sensor cook options․
Troubleshooting Common Problems
GE induction stoves may encounter issues like error codes, heating problems, or power failures; consulting the manual provides solutions for quick fixes․
Stove Not Turning On
If your GE induction stove fails to power on, begin by verifying the power cord is securely plugged into a functioning outlet․ Check the circuit breaker or fuse box to ensure the appliance’s circuit hasn’t tripped or blown – a common initial issue․ Consult your GE induction stove manual for specific breaker/fuse requirements․
Next, examine the control panel for any illuminated indicators suggesting a lock-out or error state․ Refer to the manual’s troubleshooting section for error code definitions․ A complete power cycle – disconnecting the stove from power for several minutes – can sometimes resolve minor electronic glitches․ If these steps don’t restore power, professional service may be required, as internal components could be faulty․ Always prioritize safety and avoid attempting repairs yourself if you’re uncomfortable․
Error Codes and Their Meanings
GE induction stoves utilize error codes to diagnose internal issues, displayed on the cooktop’s control panel․ Your GE induction stove manual is crucial for deciphering these codes․ For example, an “E1” code might indicate a sensor malfunction, while “E2” could signal a communication error between the control board and the heating elements․
Common codes relate to cookware detection (“F0” or similar), overheating protection, or issues with the cooling fan․ The manual provides specific actions to take for each code – often involving power cycling the unit or contacting GE customer support․ Ignoring error codes can lead to further damage․ Always record the exact code before seeking assistance, as this significantly speeds up the troubleshooting process with a service technician․
Cookware Not Heating
If your cookware isn’t heating on a GE induction stove, first verify it’s induction-compatible – only ferrous metal (magnetic) cookware works․ Check the bottom of the pan; a magnet should strongly adhere․ Ensure the cookware is clean and flat, as debris or warping hinders contact․ Confirm the correct burner size matches the pot’s diameter for optimal energy transfer․
Also, review the stove’s manual for power level settings; some functions limit maximum heat․ A tripped circuit breaker or a power surge could also be the cause․ If the issue persists, consult the manual’s troubleshooting section or contact GE support, providing your model number for accurate assistance․ Incorrect cookware is the most frequent cause․

Warranty Information
GE appliances come with varying warranties, typically covering parts and labor for one year, with longer coverage for specific components like the induction cooktop․
GE Appliance Warranty Details
GE induction stoves are backed by a comprehensive warranty program designed to provide peace of mind․ The standard warranty typically covers one year for both parts and labor, protecting against manufacturing defects in materials and workmanship․ However, specific components, such as the glass cooktop, may have extended warranty periods, sometimes up to five years for defects related to cracking or chipping․
This warranty excludes normal wear and tear, accidental damage, improper installation, or misuse of the appliance․ To ensure valid warranty coverage, it’s crucial to register your appliance promptly after purchase․ Proof of purchase, like a receipt, is also essential when filing a warranty claim․ Detailed warranty information, including specific terms and conditions, can be found within the product manual or on the GE Appliances website․
How to Register Your Appliance
Registering your new GE induction stove is a simple yet vital step to activate your warranty and receive important product updates․ You can register online through the official GE Appliances website – simply locate the registration section and enter your model and serial number, alongside your purchase details․ Alternatively, you can complete a mailed-in registration card, often included with the appliance packaging․
Having your appliance registered ensures GE can contact you regarding safety notices, recalls, or new features․ Keep your purchase receipt and the appliance’s serial number readily available during the registration process․ Registration is free and typically takes only a few minutes to complete, providing valuable protection and support throughout your ownership experience․
Contacting GE Customer Support
For assistance with your GE induction stove, GE offers multiple convenient support channels․ You can reach their dedicated customer service team via phone, utilizing the number listed in your owner’s manual or on the GE Appliances website․ Alternatively, explore the comprehensive online support resources, including FAQs, troubleshooting guides, and downloadable manuals․
GE also provides support through their website’s chat feature, offering real-time assistance from a knowledgeable representative․ Social media channels, like Twitter, can also be used to reach out for support․ When contacting support, have your model and serial number handy to expedite the process․ GE is committed to providing prompt and effective assistance to ensure your satisfaction․