Microbiology lab manuals, like Cappuccino’s 11th edition, require precise answers. These answer keys aid comprehension of experiments involving protozoa, staining, and culture techniques.
Purpose of Answer Keys
Answer keys for microbiology lab manuals serve a crucial pedagogical function, extending beyond simple verification of correct responses. They are designed to reinforce the core principles underpinning each experiment, fostering a deeper understanding of microbiological techniques and concepts. Specifically, these keys provide students with a benchmark for self-assessment, allowing them to identify areas where their understanding may be incomplete or inaccurate.
For instance, when analyzing protozoan morphology – identifying Entamoeba histolytica cysts or Trypanosoma gambiense in blood smears – the answer key confirms accurate observation and differentiation. Similarly, in staining procedures like the Gram stain, the key clarifies expected results, aiding in the comprehension of bacterial cell wall structures.
Furthermore, these keys aren’t merely about ‘right’ or ‘wrong’ answers; they often include explanations of the scientific rationale behind each step, such as the purpose of heat fixation or the impact of varying incubation conditions (temperature, CO2) on culture growth. This detailed approach transforms the answer key into a valuable learning tool, promoting critical thinking and analytical skills essential for success in microbiology.
Importance for Students
Microbiology lab manual answer keys are indispensable resources for students navigating the complexities of the subject. They empower students to independently evaluate their performance, moving beyond rote memorization towards genuine comprehension of laboratory procedures and theoretical underpinnings. Access to these keys facilitates a proactive learning approach, encouraging students to identify and rectify misunderstandings before they solidify.
Consider the streak plate method; the answer key clarifies expected isolation patterns, helping students troubleshoot their technique. Similarly, understanding the correct sequence for staining – crystal violet, iodine, alcohol decolorization, and safranin counterstain – is reinforced by comparing results to the key.
Moreover, these keys build confidence. Successfully matching observations of protozoa (Giardia intestinalis, Balantidium coli) or interpreting culture outcomes with the provided solutions solidifies practical skills. They are particularly valuable when working with manuals like those from Cappuccino or Bio 4635L, ensuring students grasp the nuances of each experiment and prepare effectively for assessments.
Scope of this Guide
This guide focuses on providing support for commonly used microbiology lab manuals, specifically addressing challenges encountered while working through experiments and interpreting results. We aim to clarify procedures detailed in texts like Cappuccino’s Microbiology: A Laboratory Manual (11th edition) and the Bio 4635L Medical Microbiology Lab Manual.
Our coverage encompasses key techniques, including smear preparation, heat fixation, and various staining methods – simple, Gram, and acid-fast – offering insights into expected outcomes. We will also address the identification of both free-living and parasitic protozoa, referencing examples like Entamoeba histolytica and Trypanosoma gambiense.
Furthermore, this resource will delve into culture techniques, such as the streak plate method, and the impact of environmental factors like temperature and CO2 requirements on microbial growth. While not exhaustive, this guide serves as a valuable companion for students seeking to enhance their understanding and accuracy in the microbiology laboratory, supplementing their primary lab manual.

Understanding Common Microbiology Techniques
Microbiology labs utilize techniques like smears, heat fixing, and staining – crystal violet, iodine, alcohol, and safranin – to visualize microorganisms for accurate identification.
Smear Preparation
Smear preparation is a foundational technique in microbiology, crucial for observing bacterial morphology under a microscope. The process begins with a clean glass slide, onto which a small sample of the bacterial culture – either from a broth or a solid medium – is placed. Using a loop, a small amount of the culture is transferred and spread thinly across the slide’s surface.
The goal is to create a thin, even film of bacteria; too thick a smear will hinder visualization, while too thin a smear may lack sufficient organisms. A key step involves using a loop to create a circular spread, ensuring adequate dispersion. Following the initial spreading, the smear must be allowed to air dry completely. This is vital, as any remaining moisture will interfere with the subsequent heat fixation step.
Proper smear preparation directly impacts the quality of staining and ultimately, the accuracy of identification. Careful attention to detail at this stage minimizes artifacts and ensures a clear, representative view of the microbial cells. It’s the first, and often most critical, step in many microbiological analyses.
Heat Fixation
Heat fixation is a critical step following smear preparation, employed to adhere bacterial cells to the glass slide. This process involves passing the air-dried smear quickly through a flame – typically a Bunsen burner – two or three times. The heat denatures bacterial proteins, causing them to coagulate and firmly attach to the slide’s surface.
However, it’s crucial to avoid excessive heating, which can distort cellular morphology or even destroy the bacterial cells. The aim is to fix, not to cook! A gentle, sweeping motion with the slide through the flame is recommended. Proper heat fixation prevents the sample from washing off during staining procedures, ensuring the bacteria remain in place for microscopic examination.
Successful heat fixation results in a smear where cells are firmly attached, allowing for clear staining and accurate observation. It’s a delicate balance – sufficient heat for adhesion, but not enough to cause irreversible damage. This technique is fundamental for reliable microscopic analysis in microbiology labs.
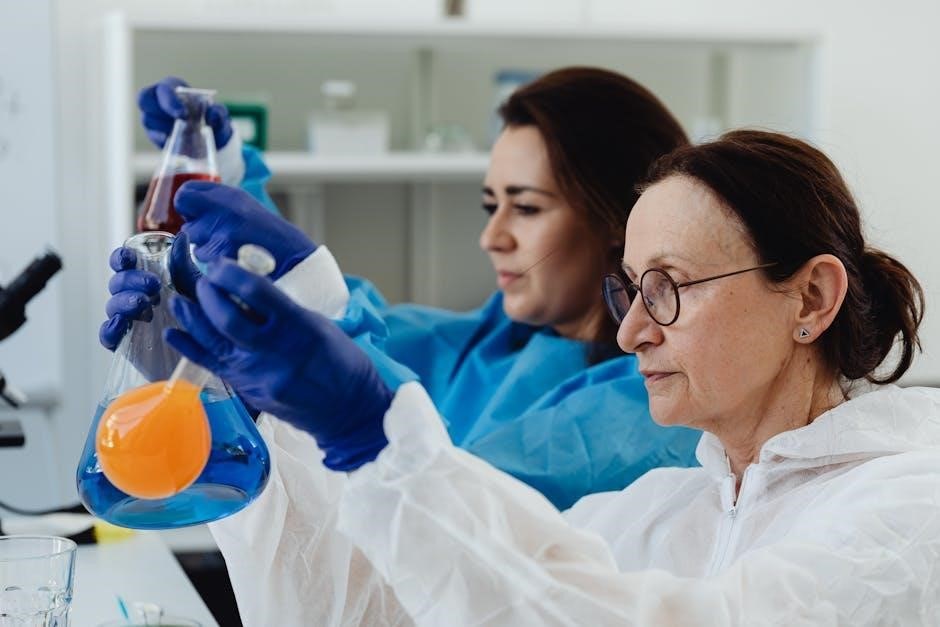
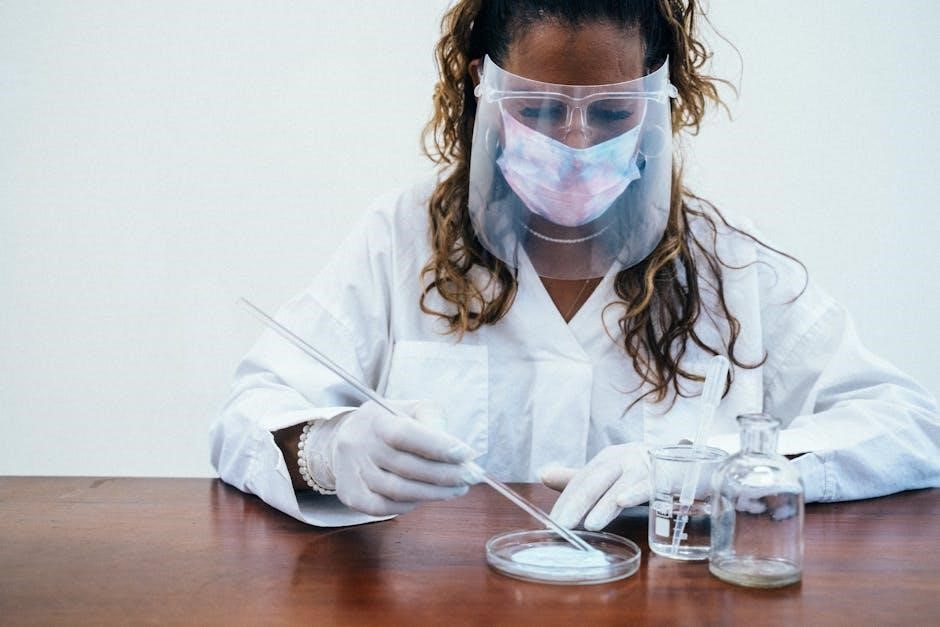
Staining Procedures
Staining procedures are essential in microbiology to enhance the contrast between bacterial cells and their background, making microscopic observation easier. Several staining techniques exist, categorized as simple, differential, or special stains. Simple staining utilizes a single dye, like crystal violet, to color all cells uniformly, revealing their shape and arrangement.
Differential staining, such as the Gram stain, distinguishes bacteria based on differences in their cell wall structure. The procedure involves crystal violet, iodine, alcohol decolorization, and safranin counterstain, categorizing bacteria as Gram-positive (purple) or Gram-negative (pink/red); Acid-fast staining, employing carbolfuchsin, identifies acid-fast bacteria like Mycobacterium, which resist decolorization with acid-alcohol.
Each staining method follows a specific protocol: applying the dye, rinsing with water, and often employing a decolorizer or counterstain. Proper technique, including timing and reagent application, is vital for accurate results. Staining allows for bacterial identification and characterization, crucial for diagnostic and research purposes.
Simple Staining
Simple staining is a foundational technique in microbiology, employing a single dye to color bacterial cells. This method reveals the basic morphology – shape, size, and arrangement – of microorganisms. Common dyes include methylene blue, crystal violet, and safranin. The procedure is straightforward: a bacterial smear is prepared, heat-fixed to adhere cells to the slide, and then flooded with the chosen dye for a specified time, typically one minute.
Following dye application, excess stain is gently rinsed off with water. The slide is then blotted dry and observed under a microscope, initially with low power and progressing to oil immersion for detailed visualization. Simple staining doesn’t differentiate between bacterial groups; it provides a general overview of cellular characteristics.
Successful simple staining results in uniformly colored cells against a clear background. Proper smear preparation and heat-fixation are crucial for optimal staining. This technique serves as a preliminary step before more complex staining procedures, like Gram staining.
Differential Staining (Gram Stain)
The Gram stain is a pivotal differential staining technique, categorizing bacteria into two major groups: Gram-positive and Gram-negative. This distinction hinges on differences in cell wall structure. The procedure involves four key steps: crystal violet (primary stain), Gram’s iodine (mordant), alcohol (decolorizer), and safranin (counterstain).
First, the smear is stained with crystal violet, followed by iodine, forming a crystal violet-iodine complex. Alcohol then decolorizes Gram-negative cells due to their thinner peptidoglycan layer and higher lipid content, while Gram-positive cells retain the complex. Finally, safranin counterstains the decolorized Gram-negative cells, rendering them pink or red.
Gram-positive bacteria appear purple/blue, indicating a thick peptidoglycan layer, while Gram-negative bacteria appear pink/red. Correct execution – proper decolorization being critical – is essential for accurate results. The Gram stain aids in bacterial identification and guides antibiotic selection.
Acid-Fast Staining
Acid-fast staining is a differential technique used to identify acid-fast bacteria, notably those from the genus Mycobacterium, which possess a waxy mycolic acid layer in their cell walls. This layer renders them resistant to decolorization with acid-alcohol.
The procedure begins with staining using carbolfuchsin, often with heat to aid penetration of the mycolic acid layer. Following this, a decolorizer, typically acid-alcohol, is applied. Acid-fast bacteria retain the carbolfuchsin, appearing red, while non-acid-fast bacteria lose the stain and are counterstained with methylene blue, appearing blue.
This technique is crucial for diagnosing diseases like tuberculosis and leprosy. Proper heat application during carbolfuchsin staining is vital for effective penetration. Over-decolorization can lead to false negatives, while insufficient decolorization results in false positives. Accurate interpretation relies on understanding the unique cell wall composition of acid-fast organisms.
Analyzing Protozoan Morphology
Protozoan identification involves observing morphology – trophozoite and cyst forms – of species like Entamoeba histolytica, Giardia intestinalis, and Trichomonas gambiense, using microscopy.
Free-Living Protozoa Identification
Free-living protozoa, unlike their parasitic counterparts, exist independently in various environments like soil and freshwater. Experiments focusing on these organisms provide students with foundational skills in microscopic observation and morphological characterization. Identifying these protozoa relies heavily on recognizing distinct features such as cell shape, size, motility patterns, and the presence of internal structures like contractile vacuoles or food vacuoles.
Successful identification often involves careful examination of wet mounts, allowing observation of live organisms and their movement. Students learn to differentiate between various genera based on these characteristics. While specific examples weren’t detailed in the provided text, the general principle involves comparing observed traits with established taxonomic descriptions. This hands-on experience builds a crucial understanding of protozoan diversity and ecological roles.
The lab manual exercises aim to give students a brief exposure to the morphology and significance of these organisms, preparing them for more complex studies involving parasitic protozoa and their impact on human health. Accurate identification is paramount for understanding their role in ecosystems.
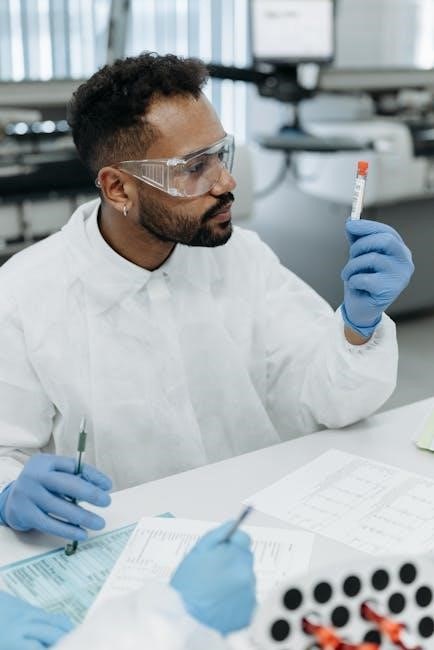
Parasitic Protozoa Identification
Parasitic protozoa, unlike free-living forms, require a host to complete their life cycle, often causing significant diseases. Laboratory identification of these organisms is crucial in clinical microbiology and public health. The provided resources highlight examples like Entamoeba histolytica (trophozoite and cyst forms), Giardia intestinalis (trophozoite and cyst forms), Babesia coli (trophozoite and cyst forms), Trypanosoma gambiense, and Plasmodium vivax, all observed in prepared smears.
Identification relies on recognizing unique morphological features within blood smears or stool samples. For instance, Plasmodium species are identified by their characteristic ring-like appearance within red blood cells. Entamoeba histolytica cysts and trophozoites exhibit distinct shapes and internal structures. Accurate differentiation between species is vital for appropriate diagnosis and treatment.
These experiments expose students to the morphology and clinical significance of parasitic protozoa. Mastering microscopic identification techniques is essential for future microbiologists and healthcare professionals. The lab manual provides a foundation for understanding parasitic diseases and their impact on global health.

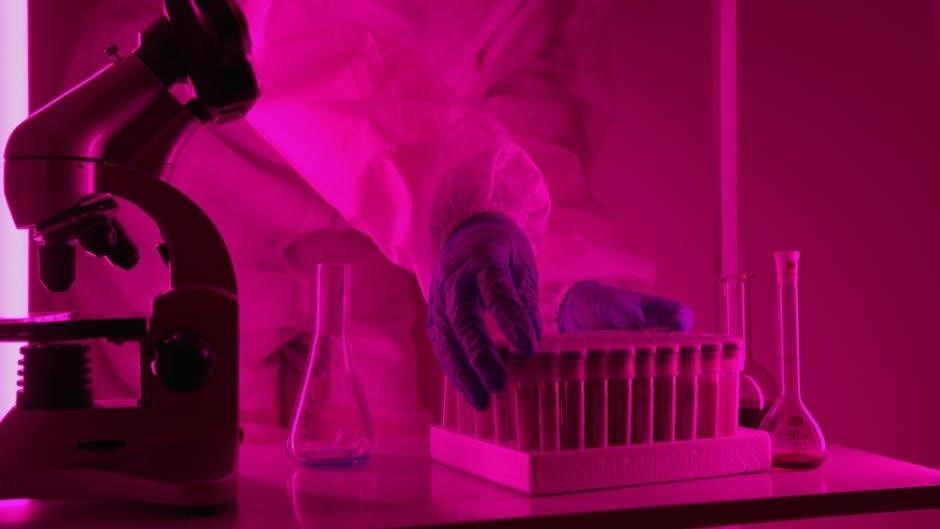
Culture Techniques and Environmental Factors
Culture techniques, like streak plating on BHI agar, isolate microorganisms. Environmental factors—temperature and CO2—significantly impact growth, requiring careful control and observation for optimal results.
Streak Plate Method
The streak plate method is a fundamental microbiology technique used to isolate pure cultures from a mixed population of microorganisms. This dilution technique aims to spatially separate individual cells on an agar plate, allowing each cell to grow into a distinct, isolated colony.
The process begins with sterilizing a loop and obtaining a small sample of the culture. The loop is then streaked across a small area of the agar plate, depositing the initial inoculum. Subsequently, the loop is sterilized again, and a new streak is made, overlapping slightly with the previous one, effectively diluting the initial sample.
This streaking pattern is repeated several times, typically across four quadrants of the plate, with each subsequent streak further diluting the inoculum. Proper technique, including consistent pressure and sterilization between streaks, is crucial for achieving well-isolated colonies.
Successful streak plating results in a plate exhibiting isolated colonies, each originating from a single bacterial cell. These isolated colonies can then be used for further study and characterization. The provided information highlights the importance of employing the quadrant streak method as demonstrated by the instructor for optimal isolation.
Incubation Conditions
Optimal incubation conditions are critical for successful microbial growth in the laboratory. Different microorganisms exhibit varying requirements for temperature and CO2 levels. Understanding these needs is essential for cultivating and studying bacteria effectively.
To determine the specific requirements of a culture, a common experiment involves transferring a loopful of the culture to multiple brain heart infusion (BHI) agar plates. Each plate is then subjected to different incubation conditions – varying temperatures and CO2 concentrations;
These plates are carefully labeled with the researcher’s initials and the designated incubation condition. This ensures accurate tracking and differentiation of growth patterns. Observing the growth characteristics on each plate allows for the identification of the optimal conditions for that particular microorganism.
Factors like temperature directly influence metabolic rates and enzyme activity, while CO2 levels affect the growth of certain bacteria, particularly those requiring a specific atmospheric environment. Careful observation and documentation of growth on each plate are vital for determining the ideal incubation parameters.
Temperature Requirements
Temperature is a paramount factor influencing microbial growth, directly impacting metabolic processes and enzymatic reactions. Microorganisms are categorized based on their optimal temperature ranges: psychrophiles (cold-loving), mesophiles (moderate-temperature loving), and thermophiles (heat-loving).
In a microbiology lab setting, determining a culture’s temperature requirements is crucial for successful cultivation. This is often achieved by incubating identical cultures at different temperatures – typically ranging from room temperature to 37°C, mirroring human body temperature, and potentially higher for thermophilic organisms.
The BHI agar plates, streaked for isolation using the quadrant streak method, serve as the growth medium. Careful observation over a defined period reveals which temperature supports the most robust growth.
Significant differences in colony formation across the plates indicate the organism’s preferred temperature range. A lack of growth or stunted development suggests the temperature is suboptimal. Accurate documentation of these observations is essential for identifying the ideal temperature for that specific microbe, ensuring reliable and reproducible results.
CO2 Requirements
Carbon dioxide (CO2) plays a vital role in microbial metabolism, serving as a carbon source and influencing pH levels within the growth medium. Some microorganisms require elevated CO2 concentrations for optimal growth, categorized as capnophiles. These organisms struggle to thrive in standard atmospheric conditions.
Determining CO2 requirements in a lab setting involves comparing growth on BHI agar plates incubated under varying CO2 levels. One plate is incubated in ambient air, another in a CO2-enriched environment – often achieved using a CO2 incubator, and potentially a third with a CO2-generating system.
The quadrant streak method ensures isolated colonies, allowing for clear observation of growth differences. Enhanced growth on the CO2-enriched plate indicates a capnophilic nature, while comparable growth across all plates suggests the organism is not particularly CO2-dependent.
Accurate labeling of plates with incubation conditions and meticulous observation of colony morphology are crucial. Documenting these findings provides valuable insight into the organism’s metabolic needs and informs appropriate cultivation strategies;
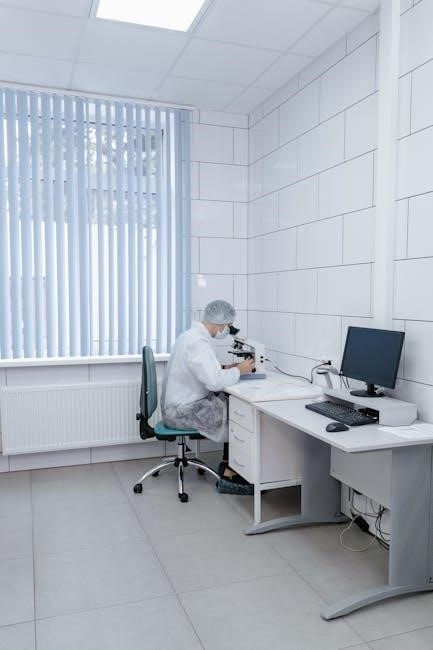
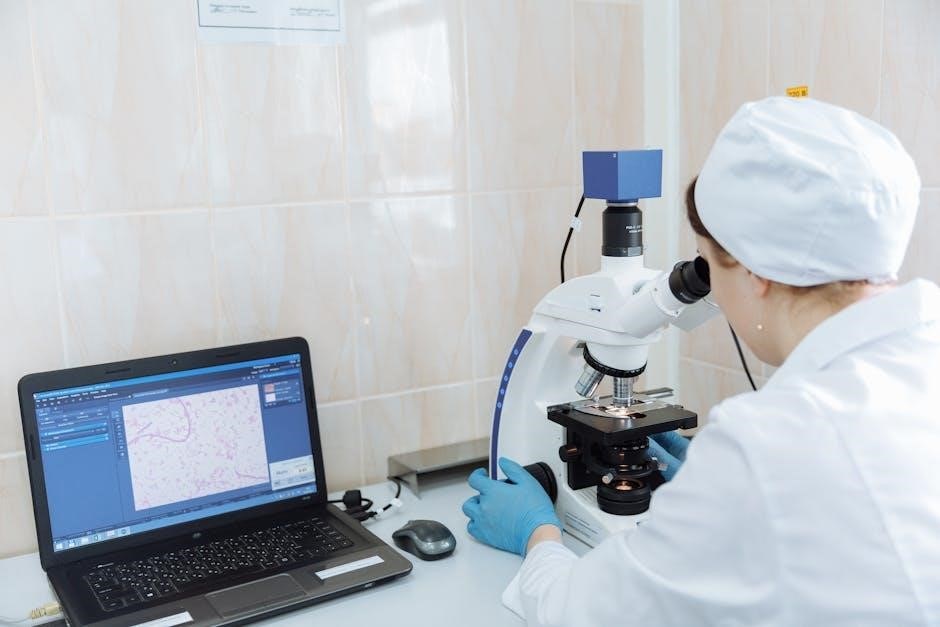
Microscope Usage and Slide Preparation
Proper slide preparation – smears, heat fixation, and coverslipping – is fundamental. Microscope components must be understood for clear visualization, utilizing oil immersion effectively.
Microscope Components
Understanding the microscope is crucial for successful microbiological observation. The objective lenses – typically 4x, 10x, 40x, and 100x (oil immersion) – provide varying levels of magnification. The ocular lens (eyepiece) usually magnifies 10x. Proper alignment of these lenses is essential for clear imaging.
The stage supports the slide, and stage clips secure it in place. Coarse and fine focus knobs adjust the distance between the objective lens and the specimen, bringing it into sharp focus. The condenser focuses light onto the specimen, and the iris diaphragm controls the amount of light.
Illumination is provided by a light source, and the rheostat adjusts the light intensity. Careful manipulation of these components ensures optimal visualization of microbial structures. Remember to always start with the lowest power objective lens when initially viewing a slide, then gradually increase magnification as needed. Proper care and maintenance of the microscope are also vital for longevity and accurate results.
Slide and Coverslip Handling
Preparing slides correctly is fundamental to microbiology. Always begin with a clean glass microscope slide. When creating a smear, apply a small sample to the slide and spread it thinly. Heat fixation, a crucial step, adheres the microorganisms to the slide, preventing washing away during staining.
A coverslip is gently lowered onto the smear at an angle to avoid air bubbles. This protects the specimen and provides a flat surface for observation. Handle coverslips with care, as they are fragile and can easily break. Avoid excessive pressure when lowering the coverslip, as this can crush the sample.
Proper handling minimizes contamination and ensures accurate results. Clean slides and coverslips thoroughly before and after use. Dispose of used slides and coverslips in designated sharps containers. Remember, a well-prepared slide is the foundation for successful microscopic examination and accurate identification of microorganisms.
Pasteur Pipette Technique
The Pasteur pipette is an essential tool for transferring small volumes of liquid in microbiology labs. Unlike graduated pipettes, Pasteur pipettes are not calibrated for precise measurements, but are ideal for transferring cultures and reagents. To use, depress the bulb firmly and place the tip into the liquid, then slowly release the bulb to draw up the sample.
Control the aspiration by adjusting the pressure on the bulb. Avoid drawing liquid into the bulb itself. When dispensing, gently squeeze the bulb to release the liquid. For transferring broth cultures, a single Pasteur pipette can be used for multiple transfers, but avoid contaminating the stock solution.
Always use a fresh pipette for each different culture to prevent cross-contamination. Dispose of used Pasteur pipettes in appropriate biohazard containers. Mastering this technique ensures accurate and safe handling of microbial samples throughout various lab procedures.
Specific Lab Manual References
Key manuals include Cappuccino’s 11th edition, Fundamentals: A Clinical Approach, and Bio 4635L. Solutions are available online, aiding students with experiment analysis and comprehension.
Cappuccino Microbiology Lab Manual (11th Edition)
Cappuccino’s Microbiology: A Laboratory Manual, 11th Edition, is a widely used resource for introductory microbiology courses. Finding accurate answer keys for this manual can significantly enhance the learning experience, particularly for complex experiments like those involving protozoan identification (E. histolytica, G. intestinalis, B. coli, T. gambiense, and P. vivax).
Students often seek solutions for experiments 32 and 33, focusing on free-living and parasitic protozoa morphology. The manual emphasizes practical skills, including smear preparation, heat fixation, and various staining procedures. Accessing a solutions manual, available through resources like testbanklive.com, provides detailed guidance.
These resources offer step-by-step assistance with techniques like Gram staining – involving crystal violet, iodine, alcohol decolorization, and safranin counterstaining – and aid in understanding the importance of proper slide handling, Pasteur pipette usage, and accurate microscopic observation under oil immersion. The availability of a complete solutions manual streamlines the learning process and reinforces key microbiological concepts.
Fundamentals: A Clinical Approach Lab Manual
Laboratory Manual for Microbiology Fundamentals: A Clinical Approach, authored by Steven Obenauf and Susan Finazzo, provides a comprehensive guide to essential microbiology techniques. This manual, built on decades of experience, focuses on practical application and clinical relevance, making answer keys invaluable for student success.
While specific answer keys aren’t explicitly detailed in the provided text, the manual’s structure suggests a focus on mastering core skills. These include proper smear preparation, heat fixation, and staining procedures – crucial for accurate identification of microorganisms. Understanding these foundational techniques is paramount for clinical microbiology.
The manual likely provides detailed protocols for various experiments, requiring students to demonstrate proficiency in techniques like streak plate isolation using the quadrant streak method. Successful completion relies on precise execution and accurate interpretation of results. Access to supplementary resources or instructor-provided guidance would be beneficial for verifying understanding and mastering the clinical applications presented within the manual.
Bio 4635L Medical Microbiology Lab Manual
The Bio 4635L Medical Microbiology Laboratory Lab Manual emphasizes practical application of microbiological techniques within a clinical context. A key component of mastering these skills involves accurately performing and interpreting staining procedures, specifically the Gram stain. The provided protocol details a step-by-step process: crystal violet staining, iodine application, alcohol decolorization, and safranin counterstaining.
Successful completion of this lab requires precise timing and technique at each stage. Correct decolorization is critical; insufficient decolorization leads to false-positive Gram stains, while excessive decolorization results in false negatives. Answer keys, or instructor feedback, are essential for verifying proper technique and understanding the underlying principles.
Furthermore, the manual addresses environmental factors influencing microbial growth, such as temperature and CO2 requirements. Students must streak plates and incubate them under varying conditions to observe the impact on culture development. Accurate documentation and interpretation of these results are vital, and access to reliable answer keys or guidance is crucial for validating experimental outcomes.