National Geographic Volcano Kit Instructions: A Comprehensive Guide
Embark on a thrilling scientific journey! This guide provides detailed instructions for the National Geographic Volcano Kit, ensuring a safe and educational experience․
Discover comprehensive user manuals, safety warnings, and step-by-step procedures for successful eruptions․
Understanding the Kit Contents
Your National Geographic Volcano Kit is brimming with everything needed to construct and erupt your very own volcano! Carefully unpack the box and verify all components are present․ Typically, you’ll find a volcano cone – often plaster-based – designed for shaping and painting․
Included are eruption powders, usually a combination of citric acid and sodium bicarbonate, which create the fizzing reaction․ A small vial of liquid “lava” – often red food coloring – is also provided to enhance the visual effect․
Furthermore, the kit often contains a base tray to contain the eruption and minimize mess․ Genuine volcanic specimens, adding an authentic touch to the learning experience, may also be included․
Don’t overlook the detailed instruction manual, crucial for safe and successful operation․ Some kits feature additional tools like stirring sticks or small brushes for painting․ Refer to the official National Geographic documentation (often available as a PDF online) to confirm the exact contents of your specific kit version․
Identifying Volcanic Components
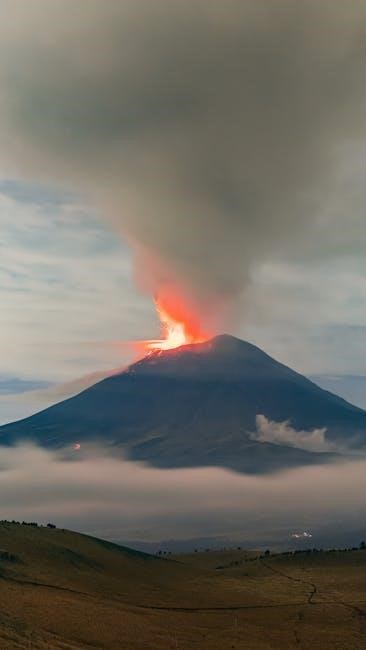
The National Geographic Volcano Kit simulates a stratovolcano, a common type known for its conical shape and explosive eruptions․ The plaster volcano cone represents the mountain’s structure, with the central crater serving as the eruption vent․ Familiarize yourself with these key features before assembly․
The eruption chamber, formed within the crater, is where the chemical reaction takes place․ This simulates the magma chamber beneath a real volcano․ The base tray acts as the surrounding landscape, catching the overflowing “lava” flow․

The citric acid and sodium bicarbonate powders are the primary reactants, mimicking the gases and pressure buildup within a volcano․ The red dye represents the molten rock, enhancing the visual realism of the eruption․
Understanding these components and their roles in the simulation is crucial for grasping the scientific principles at play․ Consult the kit’s instruction manual, often available as a downloadable PDF, for detailed diagrams and explanations of each part․ Recognizing these elements will deepen your understanding of volcanic processes․
Safety Precautions Before You Begin
Prior to commencing the volcanic eruption experiment, prioritize safety․ Adult supervision is absolutely essential, particularly for younger children․ Keep the experimental area clear of obstructions and protect surfaces with a tray or covering, as the eruption can be messy․
Always wear safety goggles to protect your eyes from potential splashes of the eruption solution․ Avoid direct contact with the citric acid and sodium bicarbonate powders, as they can cause mild irritation․ Wash hands thoroughly after handling the chemicals․
The instruction manual, often available as a PDF download, contains specific safety warnings․ Read these carefully before starting․ Keep the kit out of reach of young children and pets when not in use․ Do not ingest any of the materials․
Remember, this is a simulated eruption․ While generally safe when precautions are followed, responsible handling is paramount․ A well-prepared and supervised environment ensures a fun and educational experience for everyone involved․
Preparing the Volcano Base
Begin by assembling the volcano’s structure, typically involving a plastic cone and a sturdy base․ Refer to the National Geographic Volcano Kit’s instruction manual (often found as a PDF online) for specific assembly diagrams․ Ensure the cone is securely attached to the base to prevent tipping during the eruption․
The kit often includes plaster or a similar molding material to create a more realistic volcano shape․ Carefully mix this material with water, following the instructions precisely, to achieve the correct consistency․ Apply the mixture around the plastic cone, sculpting it to resemble a volcano’s slopes․
Allow sufficient drying time for the plaster to harden completely – typically several hours or overnight․ This is crucial for a stable volcano base․ Once dry, you can paint the volcano to enhance its appearance, using non-toxic paints․
Position the completed volcano on a protected surface, such as a tray, to contain any overflow during the eruption․ A stable and well-constructed base is fundamental for a successful and visually impressive demonstration․
Mixing the Eruption Solution
Carefully review the National Geographic Volcano Kit’s instructions (available as a PDF) regarding the eruption solution․ Typically, this involves combining two key ingredients: baking soda and vinegar․ The kit may include citric acid and sodium bicarbonate as alternatives, so always consult the manual․
Start by adding a measured amount of baking soda (or sodium bicarbonate) into the volcano’s crater․ The precise quantity is crucial for a good eruption, so adhere to the instructions․ Next, prepare the vinegar solution – often, a small amount of dish soap and red food coloring are added to enhance the visual effect․
Slowly pour the vinegar solution into the crater, observing the reaction․ The combination of baking soda and vinegar creates carbon dioxide gas, which builds pressure and causes the “eruption․” Avoid adding too much liquid at once, as this can lead to overflow․
Remember safety first! Wear eye protection and supervise children closely during this step․ A well-mixed solution, following the kit’s PDF instructions, guarantees a spectacular and safe volcanic display․
Step-by-Step Eruption Procedure
Following the National Geographic Volcano Kit’s PDF instructions is paramount for a successful eruption․ Begin by ensuring the volcano base is stable and positioned on a protective tray to contain the overflow․ Double-check that the crater is clear of any obstructions before proceeding․
Next, carefully pour the pre-mixed eruption solution (baking soda and vinegar, or citric acid and bicarbonate) into the volcano’s crater․ The kit’s manual will specify the optimal amount – avoid overfilling․ Observe the initial reaction; bubbling should commence almost immediately․
As the reaction intensifies, a foamy “lava” flow will emerge from the crater, simulating a volcanic eruption․ Maintain a safe distance and supervise children closely․ The eruption’s duration and intensity depend on the solution’s quantity and concentration․
For enhanced realism, dim the lights and narrate the eruption, explaining the scientific principles at play․ Refer to the PDF manual for troubleshooting tips if the eruption is underwhelming․ Enjoy the spectacular display!
Troubleshooting Common Eruption Issues
If your National Geographic Volcano Kit eruption is underwhelming, consult the PDF instructions for solutions․ A common issue is insufficient activation – ensure you’ve used the correct proportions of the eruption solution components (baking soda & vinegar, or citric acid & bicarbonate)․
Another frequent problem is a clogged crater․ Verify the opening is clear of any dried residue from previous eruptions․ Gently clear any blockages with a small tool, avoiding damage to the volcano’s structure․
Weak eruptions can also stem from expired or improperly stored chemicals․ Check the solution’s freshness and ensure it hasn’t absorbed moisture․ A lukewarm solution often yields a more vigorous reaction than a cold one․
If no eruption occurs, double-check the mixing order as specified in the PDF manual․ Sometimes, adding the vinegar to the baking soda, rather than vice versa, can impact the reaction․ Remember safety first – always supervise and wear eye protection!
Cleaning and Maintenance of the Volcano Model
To preserve your National Geographic Volcano Kit for future eruptions, proper cleaning is essential․ The PDF instructions emphasize gently wiping the volcano’s exterior with a damp cloth after each use, removing any lingering eruption residue․ Avoid abrasive cleaners, as they can damage the painted surface․
For stubborn stains, a mild soap solution can be used, followed by a thorough rinsing with clean water․ Ensure the model is completely dry before storing it to prevent mold or mildew growth․ Pay particular attention to the crater, removing any solidified eruption material․
The base tray should also be cleaned regularly to prevent buildup․ Avoid submerging the volcano itself in water, as this could compromise its structural integrity․ Store the kit in a cool, dry place, away from direct sunlight and extreme temperatures․
Refer to the PDF manual for specific recommendations regarding the longevity of the volcanic rock specimens included in some kits, ensuring their preservation for continued educational exploration․
Understanding the Science Behind the Eruption
The National Geographic Volcano Kit beautifully demonstrates a classic acid-base reaction․ The “lava” isn’t actual molten rock, but a simulated eruption created by combining baking soda (a base) and vinegar (an acid), as detailed in the kit’s PDF instructions․
When these two substances mix, they produce carbon dioxide gas․ This gas builds up pressure within the volcano’s chamber, eventually forcing its way out through the crater, mimicking a real volcanic eruption․ The red food coloring added to the mixture simulates the fiery glow of lava․
The kit’s manual explains that real volcanoes erupt due to pressure from magma, molten rock beneath the Earth’s surface, and dissolved gases․ The kit provides a safe and controlled way to visualize this complex geological process․
Furthermore, the included volcanic rock specimens offer a tangible connection to actual volcanic materials, enhancing the educational experience and providing a deeper understanding of Earth’s dynamic forces․ The PDF provides additional geological context․
Types of Volcanoes Represented by the Kit
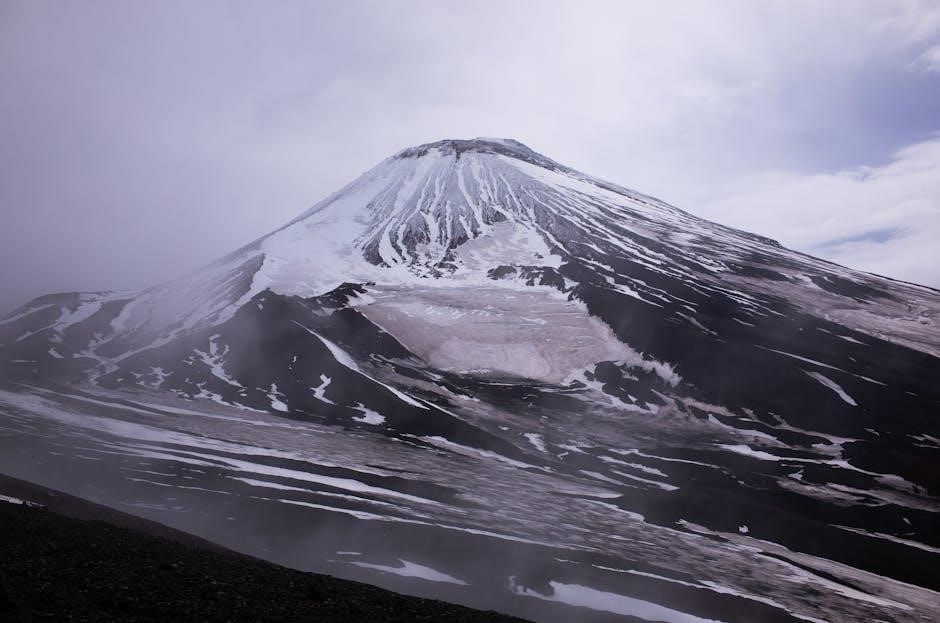
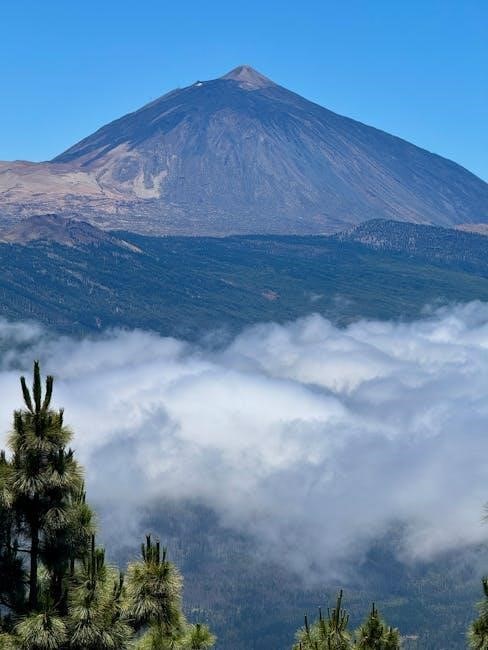
While the National Geographic Volcano Kit doesn’t replicate a specific volcano exactly, it primarily models a composite volcano, also known as a stratovolcano․ These volcanoes, like Mount Fuji or Mount Vesuvius, are characterized by their steep, conical shape built up over time by layers of lava flows, ash, and volcanic debris – a process the kit visually demonstrates․
The kit’s construction allows for building a cone-shaped structure, mirroring the typical form of a stratovolcano․ However, the eruption style simulated – a relatively explosive release of gas and “lava” – can also represent aspects of cinder cone volcanoes, which are smaller but often exhibit similar eruptive behavior․
The included volcanic rock specimens, as detailed in the kit’s PDF instructions, may originate from different volcanic types, offering a broader understanding of volcanic geology․ Examining these specimens alongside the model enhances learning about diverse volcanic formations․
It’s important to note that the kit simplifies complex geological processes․ Shield volcanoes, known for their gentle slopes and effusive eruptions, aren’t directly represented, but the kit provides a foundation for understanding all volcanic types․
Educational Value and Learning Opportunities
The National Geographic Volcano Kit offers a captivating hands-on learning experience, extending far beyond a simple science experiment․ The kit’s instructions, often available as a downloadable PDF, guide children through the principles of chemistry, specifically acid-base reactions, as the eruption is triggered․ It visually demonstrates how gases expand and create pressure, mimicking real volcanic activity․
Beyond chemistry, the kit fosters an understanding of Earth science, geology, and plate tectonics․ The included volcanic rock specimens, detailed in the manual, provide tangible connections to real-world geological formations․ Children learn about the different components of a volcano and the forces that shape our planet․
Furthermore, the kit encourages critical thinking, problem-solving, and observation skills․ Following the instructions carefully, troubleshooting potential eruption issues, and analyzing the results all contribute to these cognitive developments․ It sparks curiosity and a desire to learn more about the natural world․
The kit’s educational value is amplified when paired with supplementary resources, like video tutorials and online materials, readily accessible through Blue Marble STEM Toys and National Geographic’s website․
Expanding the Experiment: Variations and Additions
Once mastered, the basic National Geographic Volcano Kit eruption can be creatively expanded! Referencing the kit’s instructions – often found as a PDF download – as a foundation, experiment with different ratios of the eruption solution to observe varying eruption intensities and durations․ Explore using different types of vinegar, like apple cider vinegar, to see if it alters the reaction․
Enhance the visual impact by adding red food coloring to the eruption mixture, simulating lava flow․ Build a more elaborate volcano structure around the core, using clay, papier-mâché, or even recycled materials․ This encourages artistic expression alongside scientific exploration․
Introduce a geological element by researching and incorporating different types of volcanic rock into the volcano’s base, labeling each specimen․ Investigate the impact of viscosity on lava flow by adding dish soap to the eruption mixture․
Document your variations! Keep a science journal to record observations, hypotheses, and conclusions, fostering a deeper understanding of the scientific method․ Online resources, including Blue Marble STEM Toys, offer inspiration for further experimentation․
Finding the Official Instruction Manual (PDF)
Locating the official National Geographic Volcano Kit instruction manual in PDF format is crucial for a successful and safe experiment․ Several online resources offer convenient access to this document․ A primary source is often the Blue Marble STEM Toys website, the official distributor of National Geographic science kits․
Search directly on their site using keywords like “National Geographic Volcano Kit instructions PDF” or the kit’s specific model number․ Alternatively, a general web search using the same terms will yield results from various retailers and educational websites hosting the PDF․
Vimeo also hosts instructional videos, often linking to downloadable manuals․ Be cautious of unofficial sources; always verify the document’s authenticity by comparing it to information found on the official National Geographic or Blue Marble STEM Toys websites․
Ensure the PDF is complete and includes all safety warnings, setup instructions, eruption procedures, and troubleshooting tips․ Having the official manual guarantees you’re following the recommended guidelines for optimal results and a rewarding learning experience․
Where to Find Video Tutorials
Visual learners will benefit greatly from the numerous video tutorials available online demonstrating the National Geographic Volcano Kit’s assembly and eruption process․ YouTube is a prime resource, hosting a wide array of videos from both Blue Marble STEM Toys and individual users sharing their experiences․
Search for terms like “National Geographic Volcano Kit instructions” or “National Geographic Ultimate Volcano Kit tutorial” to find relevant content․ Vimeo also features helpful videos, including the official “Ultimate Volcano Instructions” video by Blue Marble Inc, providing a clear, step-by-step guide․
These videos often showcase the entire process, from base construction to mixing the eruption solution and initiating the volcanic reaction․ They can be particularly useful for clarifying any ambiguities in the written instructions and visualizing the correct techniques․
Remember to check the upload date to ensure the tutorial aligns with your kit’s version, as minor variations may exist․ Supplementing the PDF manual with video guidance enhances understanding and maximizes the educational value of the experiment․
Blue Marble STEM Toys Resources
Blue Marble STEM Toys, the creator of the National Geographic Volcano Kit, provides a wealth of resources to support your scientific exploration․ Their official website serves as a central hub for information, frequently linking to helpful videos and supplementary materials․ Specifically, their Vimeo channel hosts the “Ultimate Volcano Instructions” video, a comprehensive visual guide to the kit’s assembly and operation․
Beyond the core instructions, Blue Marble STEM Toys often shares additional tips and tricks for maximizing the eruption’s impact and understanding the underlying scientific principles․ Exploring their playlists on platforms like YouTube can reveal further demonstrations and educational content related to volcanology․
The company is dedicated to fostering STEM learning, and their resources reflect this commitment․ They aim to make science accessible and engaging for children of all ages․ Checking their website and social media channels regularly can uncover new content and updates related to the Volcano Kit and other STEM products․
Utilizing these resources alongside the official PDF manual ensures a complete and enriching learning experience, empowering young scientists to confidently build and erupt their own volcano․
Frequently Asked Questions (FAQ)
Q: Where can I find the official National Geographic Volcano Kit instructions in PDF format? A: While a direct link isn’t universally provided, searching “National Geographic Volcano Kit instructions PDF” will lead to various sources, including Vimeo’s video descriptions and third-party document repositories․ Always verify the source’s legitimacy․
Q: What if my volcano isn’t erupting? A: Ensure the powders are mixed correctly with water, following the instructions precisely․ Check for clogs in the volcano’s cone․ A tray is recommended to contain the eruption; ensure it’s adequately sized․
Q: Is this kit safe for young children? A: Adult supervision is essential․ The kit contains small parts and chemicals․ Read and adhere to all safety warnings before beginning the experiment․ Keep the kit out of reach of children when not in use․
Q: Can I reuse the eruption mixture? A: No, the mixture is a one-time use․ Dispose of it responsibly after the eruption․ Q: Where can I find video tutorials? A: Blue Marble STEM Toys’ Vimeo and YouTube channels offer helpful visual guides․
Additional Resources for Volcano Education
Beyond the National Geographic Volcano Kit, a wealth of resources exists to deepen your understanding of volcanology․ Explore the Blue Marble STEM Toys website for supplementary materials and expanded experiments․ Consider visiting the National Geographic website for articles, videos, and interactive features on volcanoes worldwide․
For a more in-depth scientific perspective, delve into educational websites like the USGS Volcano Hazards Program․ They offer detailed information on volcanic processes, monitoring, and hazards․ Numerous online encyclopedias and educational platforms provide accessible explanations of volcanic formations and eruptions․
To enhance the learning experience, search for documentaries and educational videos on platforms like YouTube․ Many institutions offer virtual field trips to volcanic regions․ Remember to always cross-reference information from multiple sources to ensure accuracy․ Utilize library resources and science museums for further exploration․ The kit’s instructions, even in PDF format, are a starting point for a broader scientific journey․